Version:nut-plugin 6.0.7-1
# 介绍
Network UPS Tools (NUT)是一种客户端 / 服务器监控系统,允许允许计算机共享不间断电源(UPS)和配电单元(PDU)硬件。
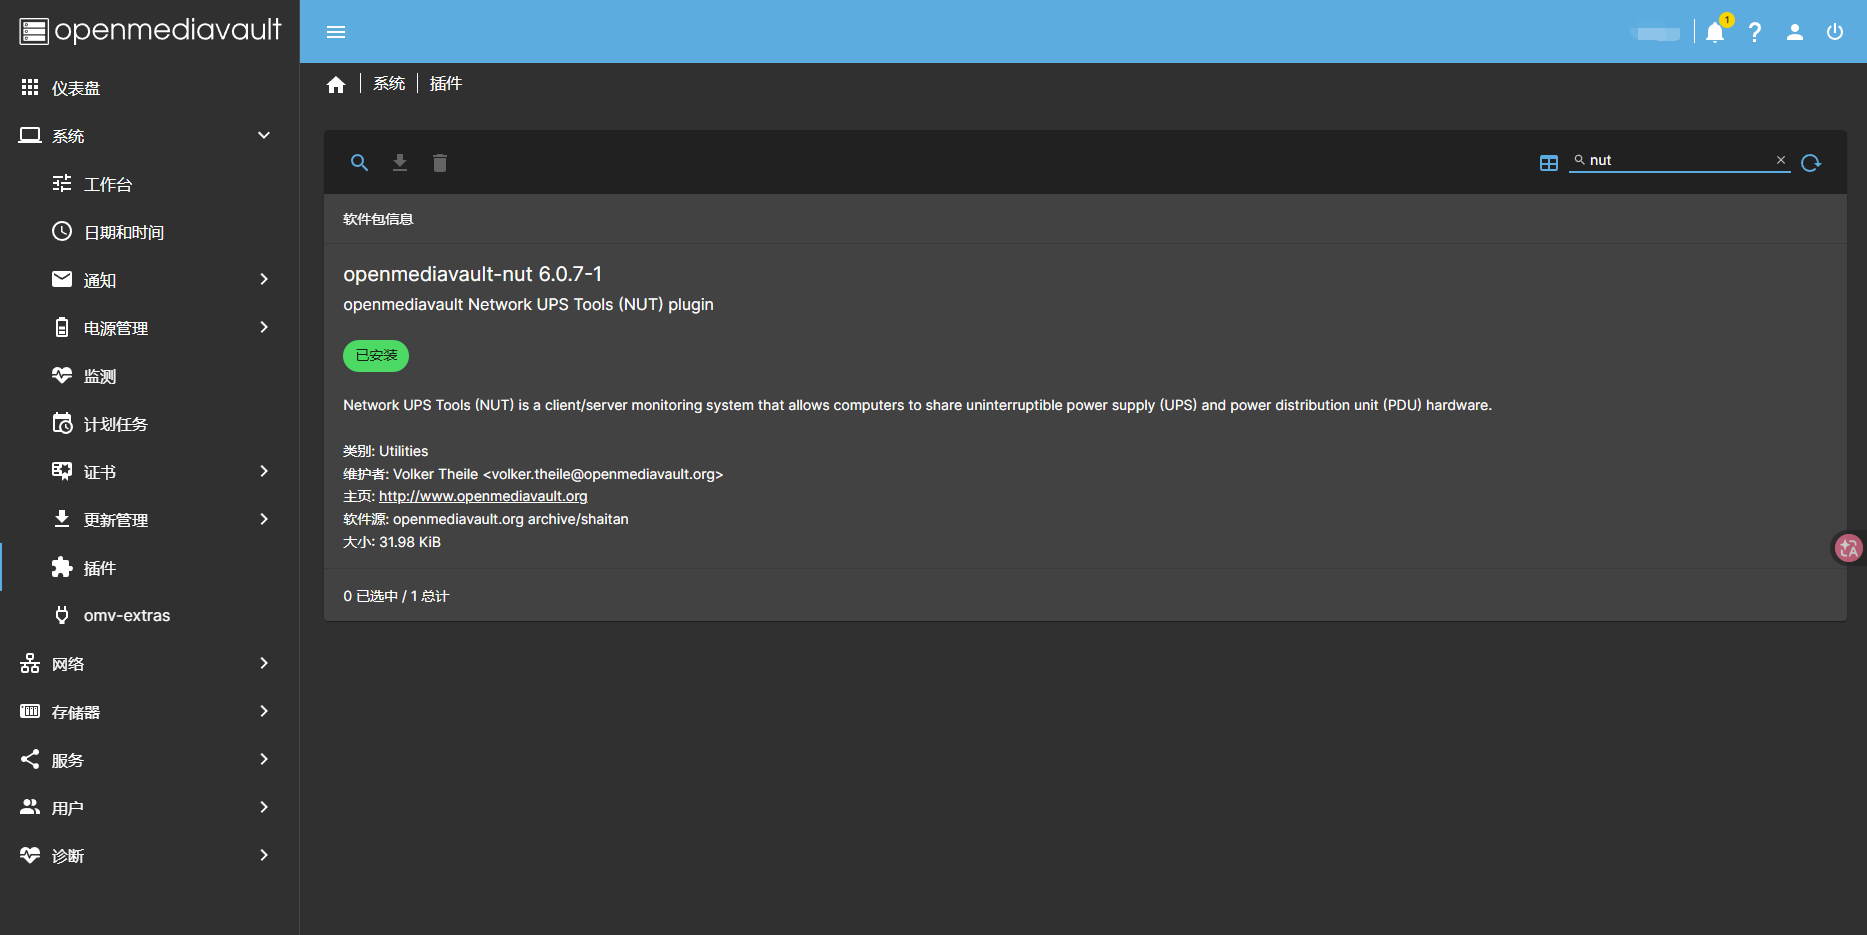
# 安装
在 OMV Web 的 系统 -> 插件 的搜索栏中搜索 nut ,然后点击安装即可。
# 使用
在 OMV Web 的 服务 -> UPS 中,按需配置,如本人使用的 APC BK650M2-CH 设备为例:
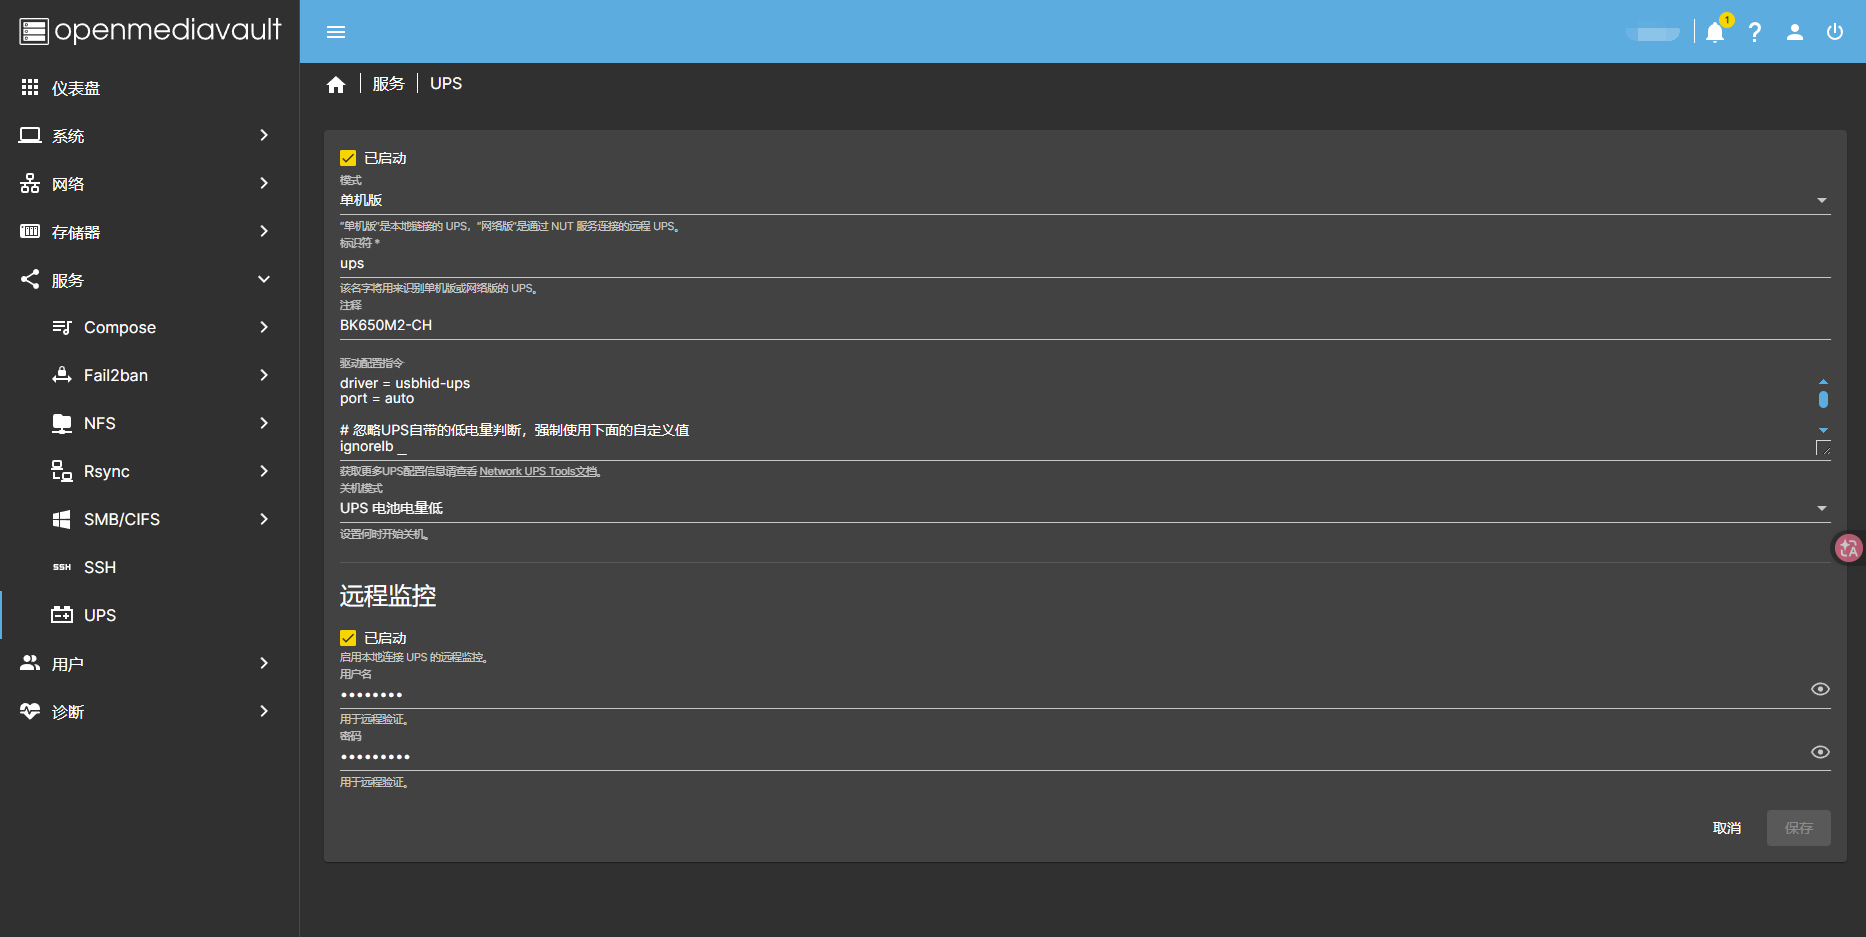
配置命令一般默认为:
driver = usbhid-ups | |
port = auto |
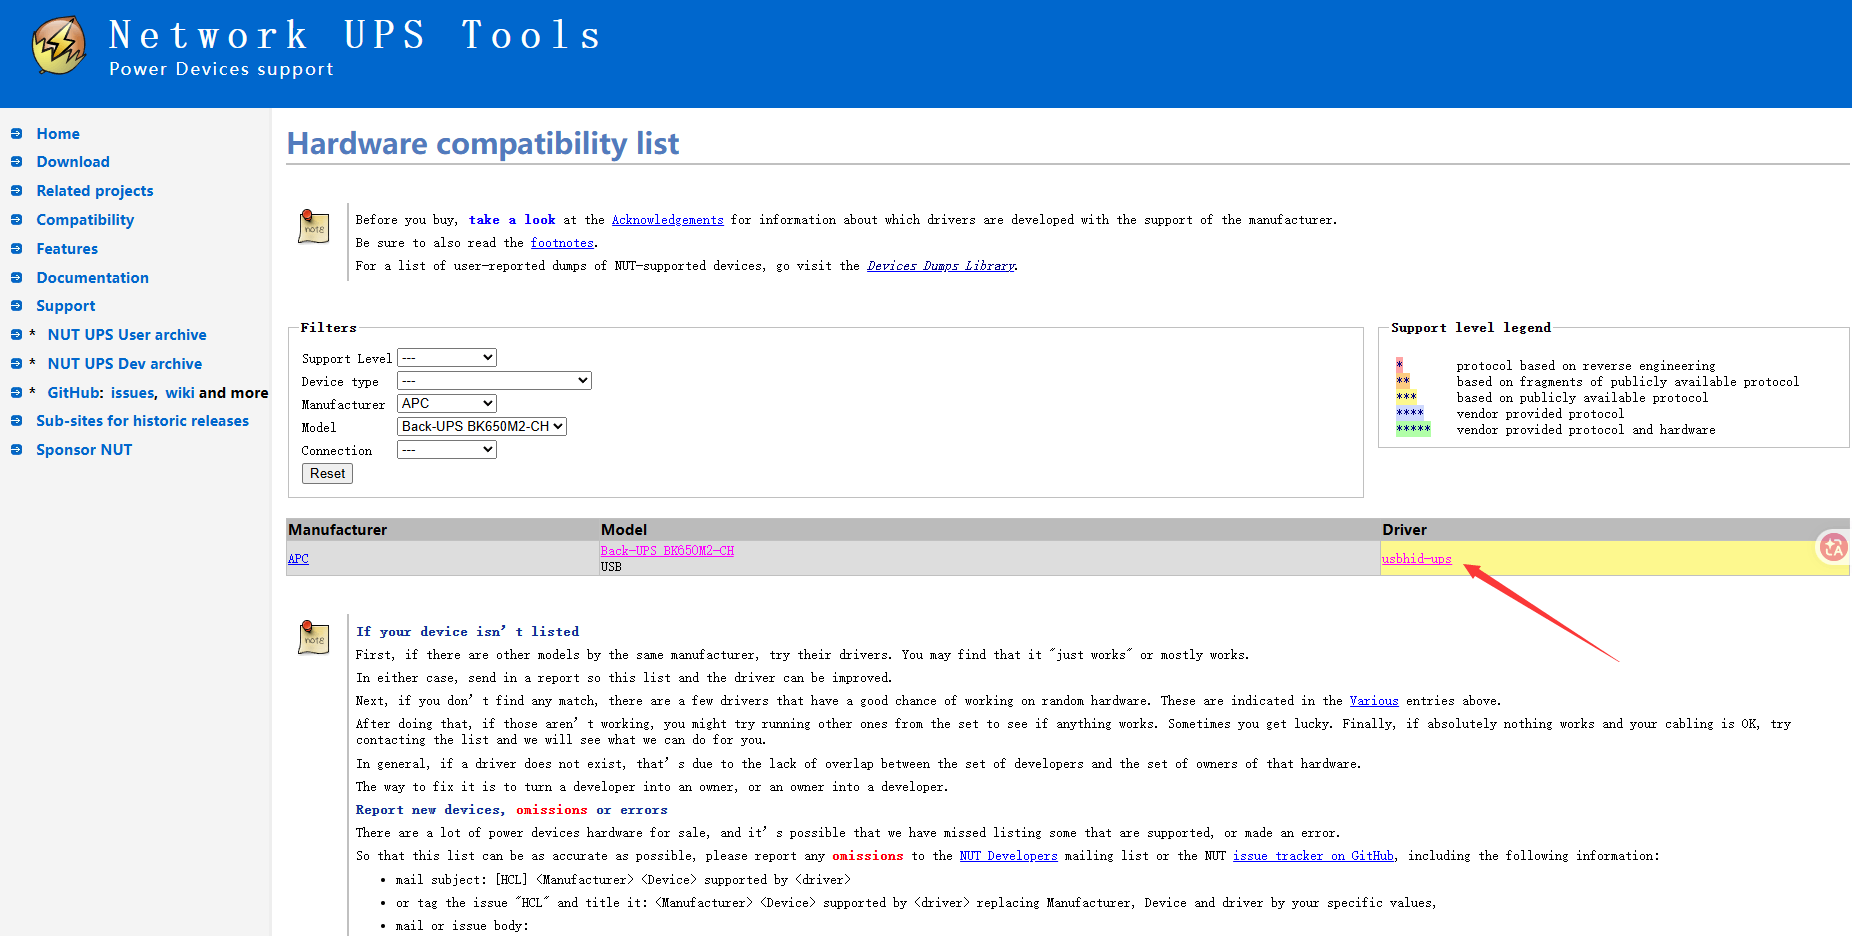
对于 driver 字段,可以在 Hardware compatibility list 中选择自己的 UPS 型号(一般常见的设备都能找到)即可查询到:
而 port 字段,则一般保留为 auto ,因为只要能识别到驱动,基本都没问题,像在这里,因为 BK650M2-CH 是使用 USB 连接的,因此可以使用命令查看驱动:
lsusb | ||
Bus 002 Device 001: ID 1d6b:0003 Linux Foundation 3.0 root hub | ||
Bus 001 Device 008: ID 051d:0002 American Power Conversion Uninterruptible Power Supply | ||
Bus 001 Device 001: ID 1d6b:0002 Linux Foundation 2.0 root hub |
额外的,如果你想修改一些 ups 配置属性,例如:
# 忽略UPS自带的低电量判断,强制使用下面的自定义值 | |
ignorelb | |
# 电池电量低于35%触发低电 | |
override.battery.charge.low = 35 | |
# 剩余运行时间低于300秒(5分钟)触发低电 | |
override.battery.runtime.low = 5 | |
# 输入灵敏度(可选值:low/medium/high) | |
override.input.sensitivity = low | |
# 输入电压上限(超过则切换到电池) | |
override.input.transfer.high = 278 | |
# 输入电压下限(低于则切换到电池) | |
override.input.transfer.low = 160 | |
# 关机前等待120秒 | |
override.ups.delay.shutdown = 120 |
属性配置可参考:https://forum.openmediavault.org/index.php?thread/8432-nut-not-turning-server-off-if-ups-reaches-low-battery-is-set-working-with-ups-go/
如果你像这样使用 UPS 使用电池供电 模式:
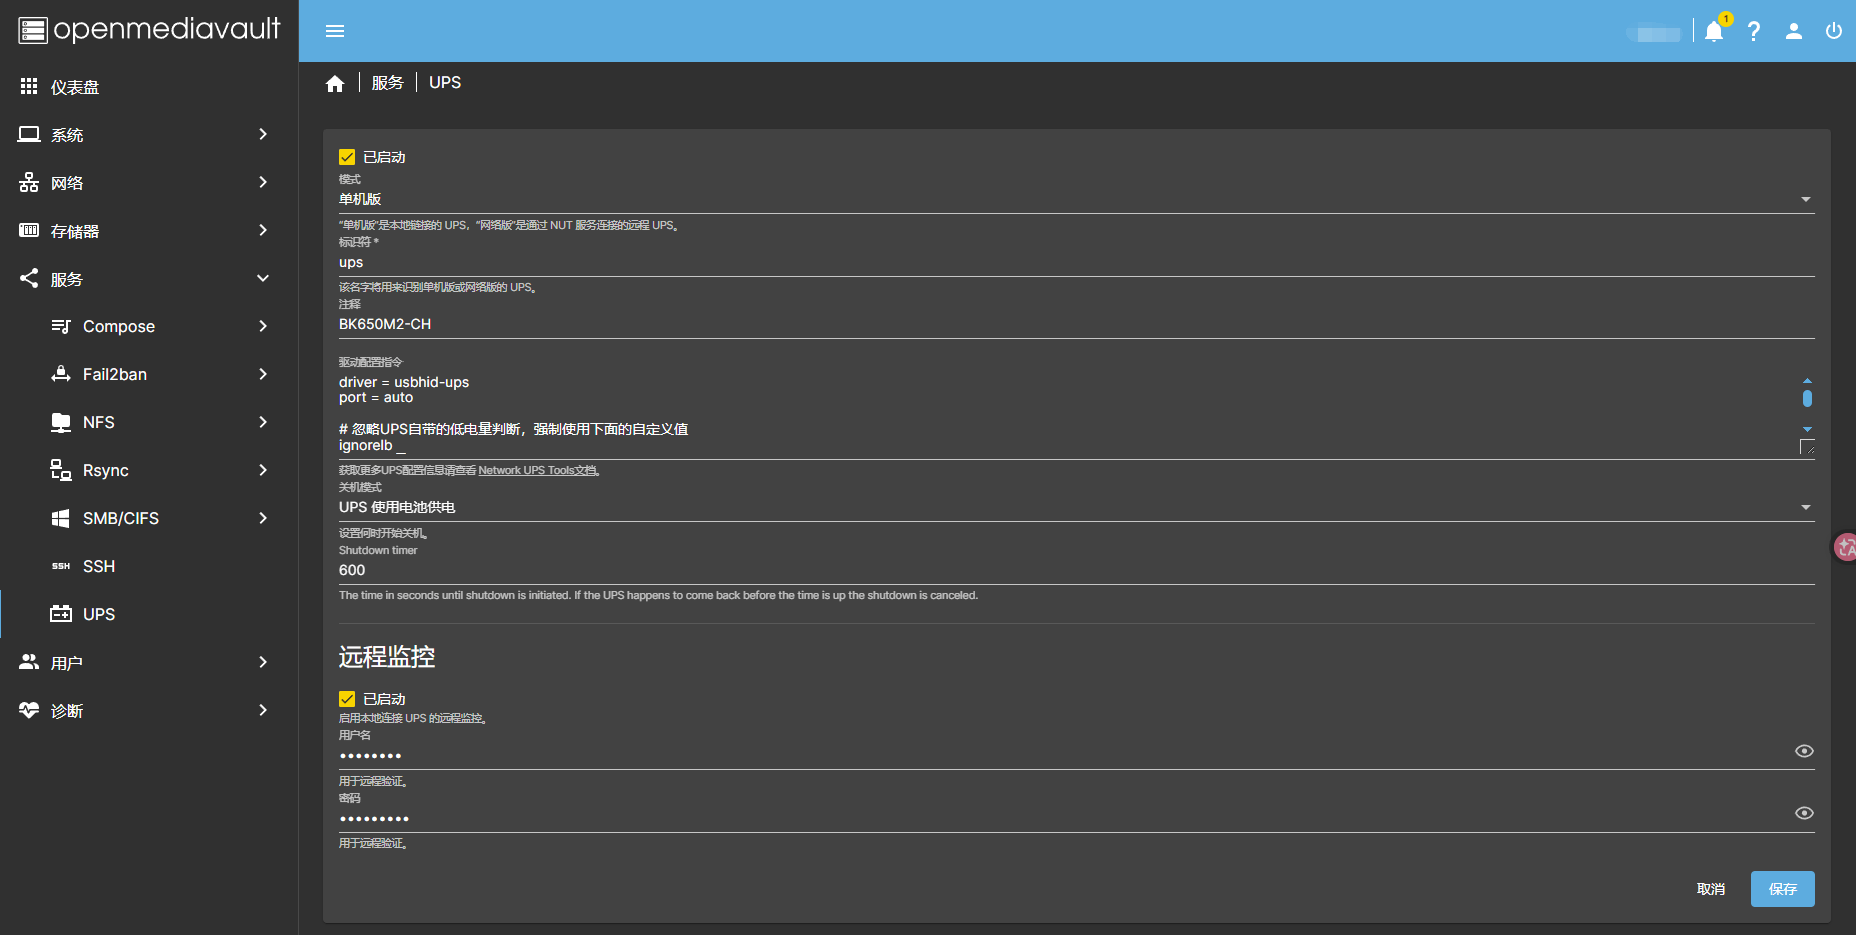
那么,主机会无视 UPS 发出命令,只监视是否转换成电池供电,一旦处于电池供电将会进入下面的关机倒计时,待计时结束仍然没切换成市电那就执行关机处理。
需要注意的是:OMV 的 NUT (Network UPS Tools) 插件本身不提供 Web 用户界面;因此即使你直接 web 访问 3493 端口也无法出现 web-ui 图形监管,如有需要请看下面的 Web-UI 部署。
NO, port 3493 is for comunications between NUT server and UPS, not a webGUI Port.
查看:https://forum.openmediavault.org/index.php?thread/40817-should-nut-have-a-webui/
部分对于第三方需要操作 UPS 的客户端,像后面的 Web-UI 查看及管理,如果直接用 远程监控的用户密码 :

那么,你只有参看操作,并没有控制权,而 OMV Web 这里又没有权限操作,因此需要你自己在 /etc/nut/upsd.users 文件中添加权限属性,一般有三个:
| 操作类型 | 需要的权限 |
|---|---|
发送即时命令 (Instant Command) (如 test.battery.start.quick ) | 用户配置中必须包含 instcmds 字段 |
修改变量 (Set Variable) (如 battery.charge.low ) | 用户配置中必须包含 actions = SET |
| 执行强制关机 (FSD) | 用户配置中必须包含 actions = FSD |
具体可看:https://networkupstools.org/docs/man/upsd.users.html
当然,在 /etc/nut/upsd.users 中,你也可以看到 admin 账户密码并使用;但值得注意的是,每次在 OMV Web 上保存 UPS 的配置,该 /etc/nut/upsd.users 文件都会重置,因此不管是用 admin 账号 (密码将会重新生成) 还是手动为 远程监控的用户 添加属性 (权限将会被清除),都要再次作处理:
# This file is auto-generated by openmediavault (https://www.openmediavault.org) | |
# WARNING: Do not edit this file, your changes will get lost. |
# Web-UI
# nut-webui
项目:https://hub.docker.com/r/gpdm/nut-webui
docker run -d \ | |
--name nut-webui \ | |
-e PUID=0 \ | |
-e PGID=0 \ | |
-e TZ=Asia/Shanghai \ | |
-p 28693:80 \ | |
-v ${PWD}/nut-config:/etc/nut \ | |
--restart unless-stopped \ | |
gpdm/nut-webui |
另外需要几个配置文件:
hosts.conf
# Network UPS Tools: example hosts.conf
#
# This file is used to control the CGI programs. If you have not
# installed them, you may safely ignore or delete this file.
#
# -----------------------------------------------------------------------
#
# upsstats will use the list of MONITOR entries when displaying the
# default template (upsstats.html). The "FOREACHUPS" directive in the
# template will use this file to find systems running upsd.
#
# upsstats and upsimage also use this file to determine if a host may be
# monitored. This keeps evil people from using your system to annoy
# others with unintended queries.
#
# upsset presents a list of systems that may be viewed and controlled
# using this file.
#
# -----------------------------------------------------------------------
#
# Usage: list systems running upsd that you want to monitor
#
# MONITOR <system> "<host description>"
#
# Examples:
#
# MONITOR myups@localhost "Local UPS"
# MONITOR su2200@10.64.1.1 "Finance department"
# MONITOR matrix@shs-server.example.edu "Sierra High School data room #1"
MONITOR apc@localhost "APC smart-UPS"
根据你实际信息更改连接地址
apc@localhost(其中 @ 前面的是 UPS 上的标识符) 和备注信息"APC smart-UPS"。配置参考:https://github.com/gpdm/nut/blob/master/nut-webui/files/etc/nut/hosts.conf
upsset.conf
# Network UPS Tools - upsset.conf sample file
#
# This file is provided to ensure that you do not expose your upsd server
# to the world upon installing the CGI programs. Specifically, it keeps
# the upsset.cgi program from running until you have assured it that you
# have secured your web server's CGI directory.
#
# By default, your web server will probably let anyone access upsset.cgi
# once it is installed. This means that anyone could attempt to crack
# upsd logins since they would appear to be coming from your web server,
# rather than the outside world, slipping through any ACL/ACCESS definitions.
#
# For this reason, you *MUST* first secure your CGI programs before
# enabling upsset in this configuration file. If you can't do this in
# your web server, then you should *not* run this program.
#
# For Apache, the .htaccess file can be used in the directory with the
# programs. You'll need something like this:
#
# <Files upsset.cgi>
# deny from all
# allow from your.network.addresses
# </Files>
#
# You will probably have to set "AllowOverride Limit" for this directory in
# your server-level configuration file as well.
#
# If this doesn't make sense, then stop reading and leave this program alone.
#
# Assuming you have all this done (and it works), then you may uncomment
# the line below and start using upsset.cgi through your web browser.
#
###
### I_HAVE_SECURED_MY_CGI_DIRECTORY
###
配置参考:https://github.com/gpdm/nut/blob/master/nut-webui/files/etc/nut/upsset.conf
other
curl -O "https://raw.githubusercontent.com/gpdm/nut/master/nut-webui/files/etc/nut/upsstats.html"
curl -O "https://raw.githubusercontent.com/gpdm/nut/master/nut-webui/files/etc/nut/upsstats-single.html"
配置完后需要重启一下容器让其重新读入配置:
docker restart nut-webui |
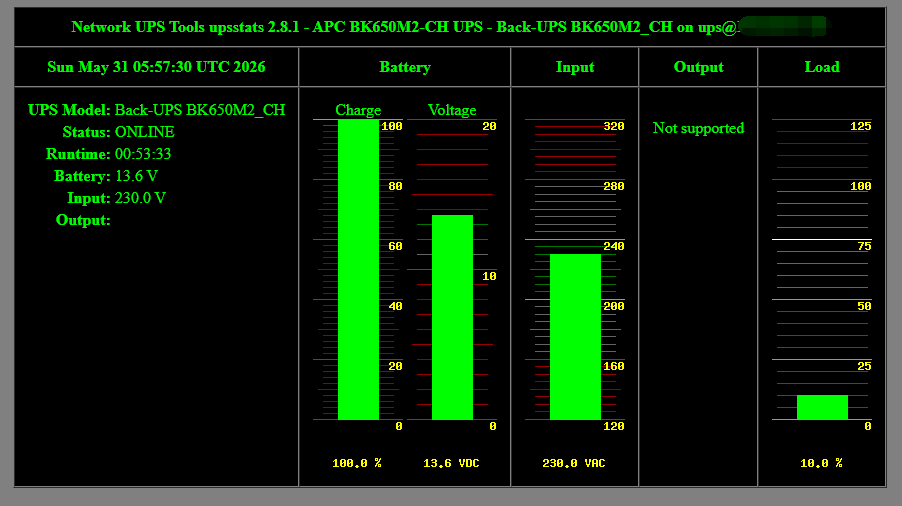
状态展示:

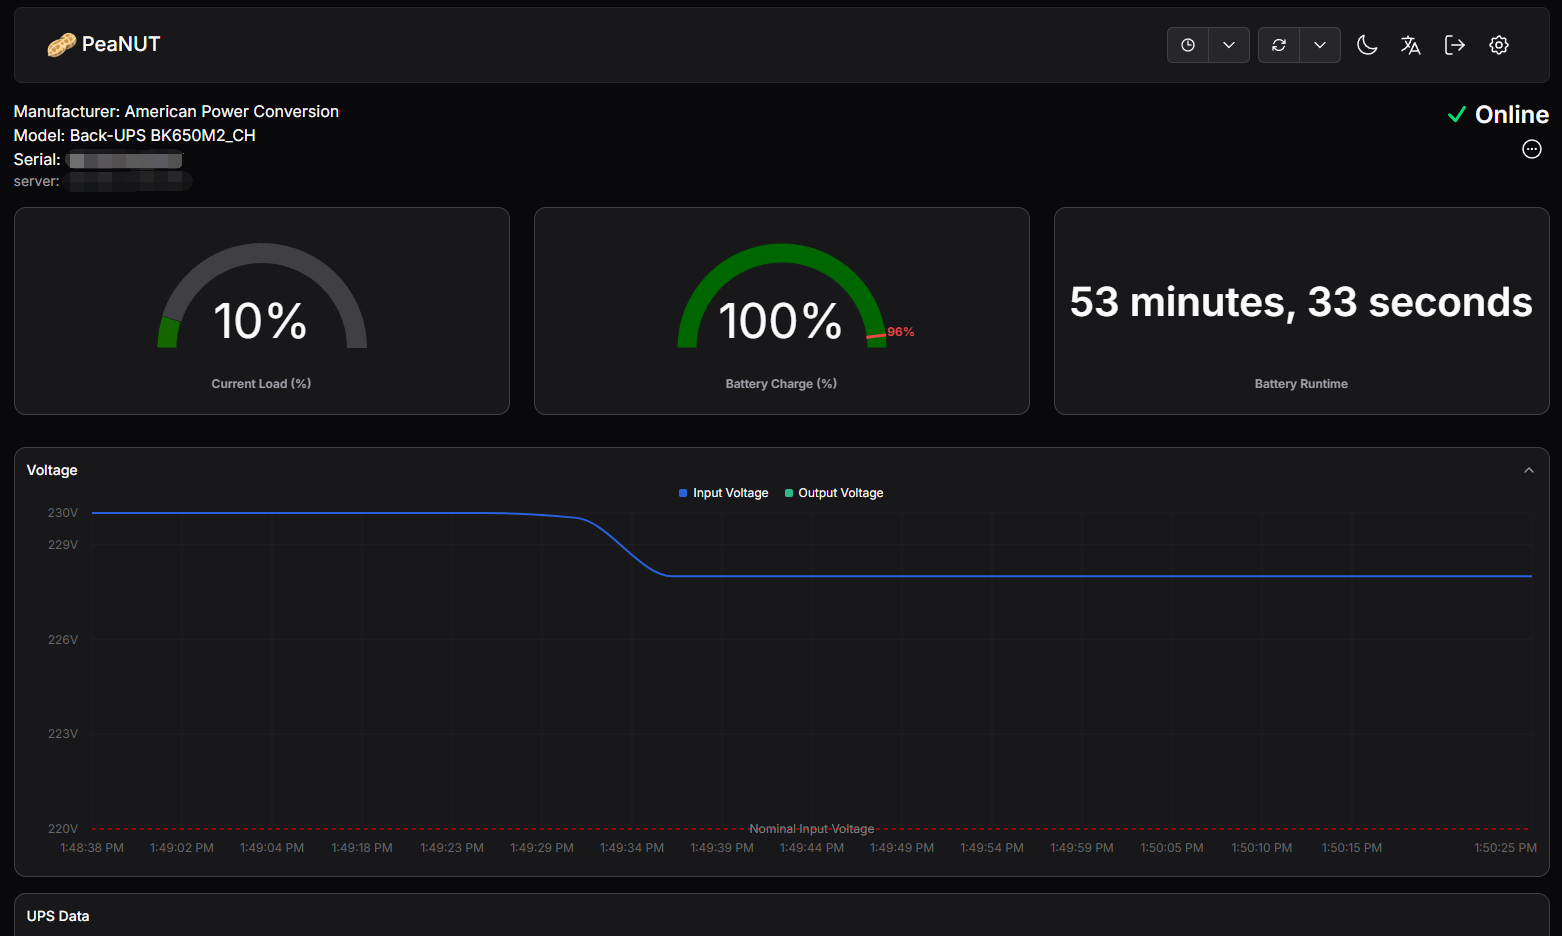
# PeaNUT
项目:https://github.com/Brandawg93/PeaNUT
docker run -d \ | |
--name peanut \ | |
-e PUID=0 \ | |
-e PGID=0 \ | |
-e TZ=Asia/Shanghai \ | |
-e WEB_PORT=8080 \ | |
-v ${PWD}/config:/config \ | |
-p 28693:8080 \ | |
--restart unless-stopped \ | |
brandawg93/peanut |
需要注意的是,如果需要更换端口,只需要修改 -p port:8080 中的端口, WEB_PORT 字段是不需要修改的,参考:https://github.com/Brandawg93/PeaNUT/issues/48 。
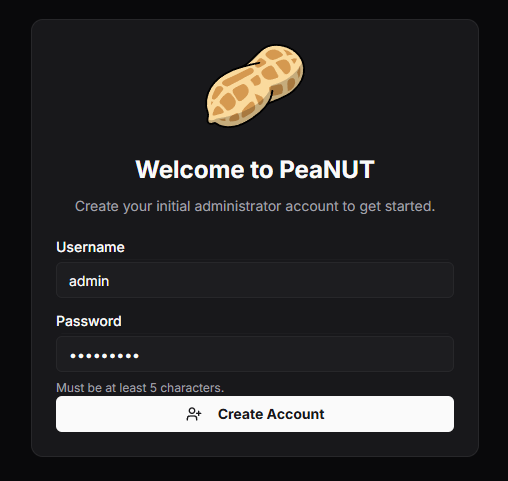
创建登录用户:
进来后第一次需要配置你的 UPS 设备交互信息,然后点击 "Apply" :
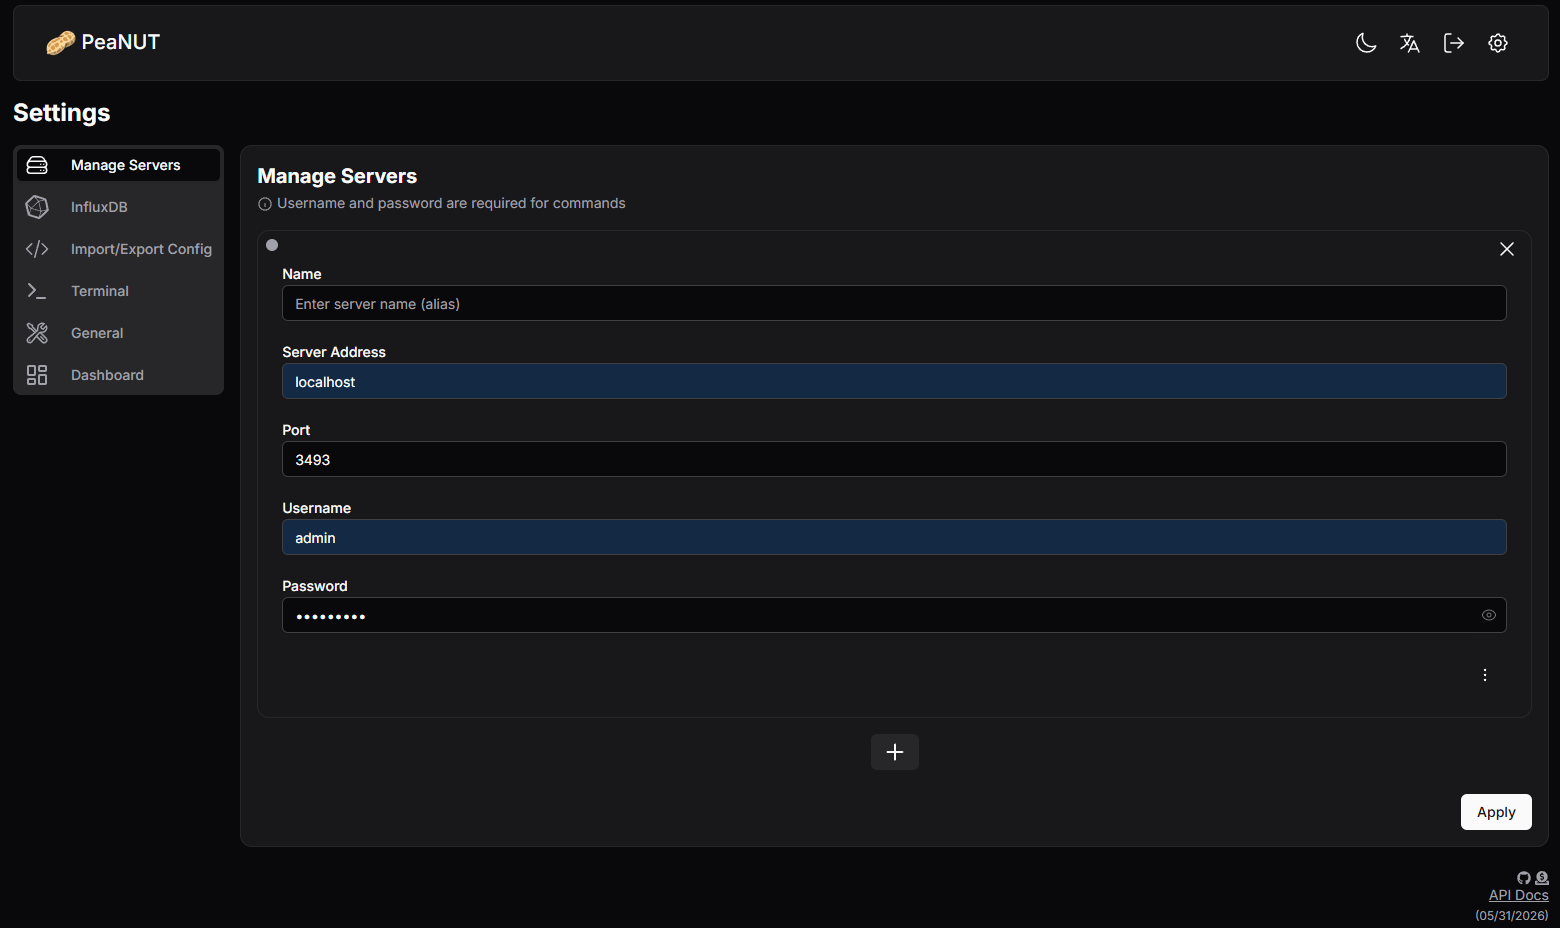
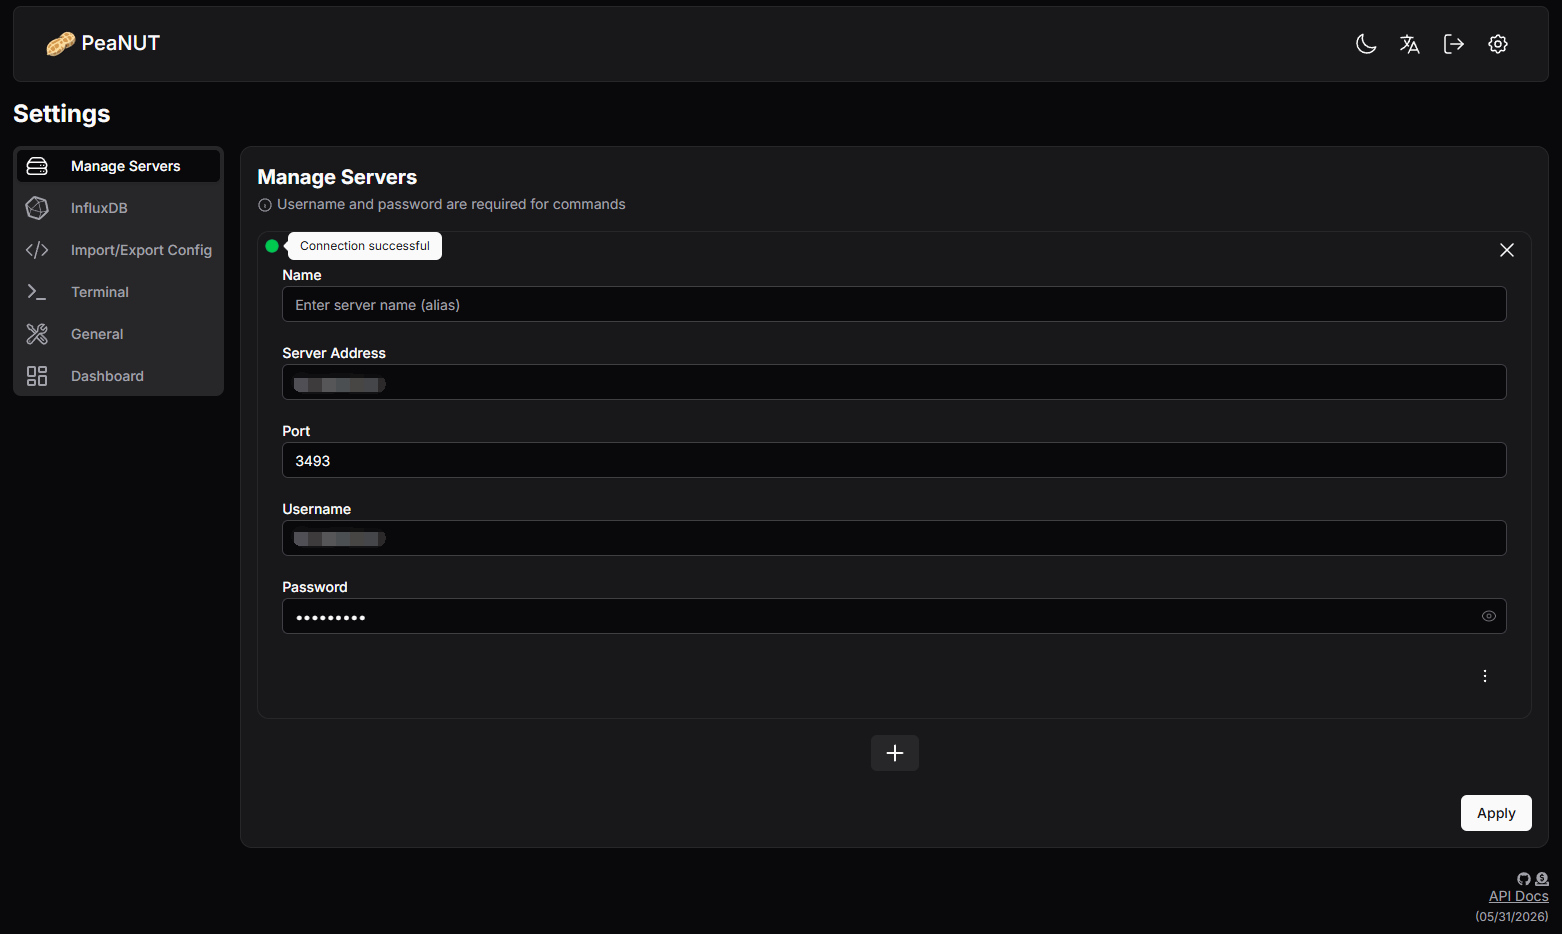
因为是在容器里,在 Server Address 中填写 localhost ,是会连失败的,因此可以填写你主机实际 ip (eg: 192.168.xxx.xxx ,或者使用 docker0 网桥的默认 ip: 172.17.0.1 ) ,当成功后左上角的状态将会显示绿色:
状态展示:

帖子:https://www.reddit.com/user/brandawg93/search/?q=peanut%3A+a+tiny+dashboard+for+network+ups+tools&cId=c0e599a4-1229-4805-bb6c-718ad427b79d&iId=d27db876-c33e-4e1d-9f23-952bd6a280e6
# Nutify
项目:https://github.com/DartSteven/Nutify
创建 docker-compose.yaml 文件:
vim docker-compose.yaml |
写入:
services: | |
nut: | |
# Container image | |
image: dartsteven/nutify:amd64-latest # Nutify image version | |
container_name: Nutify # Static container name for easy reference | |
# Privileges required for | |
# direct UPS and USB device access | |
privileged: true # Broad hardware access for NUT and USB integration | |
cap_add: | |
- SYS_ADMIN # Extended system administration capabilities | |
- SYS_RAWIO # Raw hardware I/O access | |
- MKNOD # Create special device files if needed | |
# USB device mapping | |
devices: | |
- /dev/bus/usb:/dev/bus/usb:rwm # Map host USB bus into the container | |
device_cgroup_rules: | |
- 'c 189:* rwm' # Allow all USB character devices | |
# Persistent storage and host integration | |
volumes: | |
- ./Nutify/logs:/app/nutify/logs # Application logs | |
- ./Nutify/instance:/app/nutify/instance # Persistent app data and runtime files | |
- ./Nutify/ssl:/app/ssl # SSL certificates and private keys | |
- ./Nutify/etc/nut:/etc/nut # NUT configuration directory | |
- /dev:/dev:rw # Full device tree access for hardware detection | |
- /run/udev:/run/udev:ro # Udev event access for hotplug monitoring | |
# Runtime environment | |
environment: | |
- SECRET_KEY=test1234567890 # Secret key used for sessions and encrypted values | |
- UDEV=1 # Enable udev-aware USB detection mode | |
- LOG=true # Enable general application logging: true/false, default is false | |
- LOG_LEVEL=INFO # Accepted values currently are DEBUG, INFO, WARNING, ERROR, CRITICAL | |
- LOG_WERKZEUG=true # Enable Werkzeug HTTP/server logs: true or false, default is false | |
- ENABLE_LOG_STARTUP=Y # Valid values are Y or N, default is N, any other value is treated as N | |
- SSL_ENABLED=false # true or false, default is false | |
# DNS resolvers | |
dns: | |
- 1.1.1.1 # Cloudflare DNS | |
- 8.8.8.8 # Google DNS | |
dns_opt: | |
- timeout:2 # DNS timeout per query | |
- attempts:2 # Retry count before failure | |
# Exposed ports | |
ports: | |
#- 3493:3493 # NUT daemon communication port | |
- 28693:5050 # Nutify application port | |
#- 443:443 # HTTPS secure web access | |
restart: unless-stopped # Keep the service running across failures/reboots | |
user: root # Root required for full device and NUT access |
note:
注意端口冲突,在这里由于 443 挂载的 OMV 网页,3493 则是 OMV 的 nut-plugin 插件使用,因此对于充当 Web-UI 来说,实际并不需要。
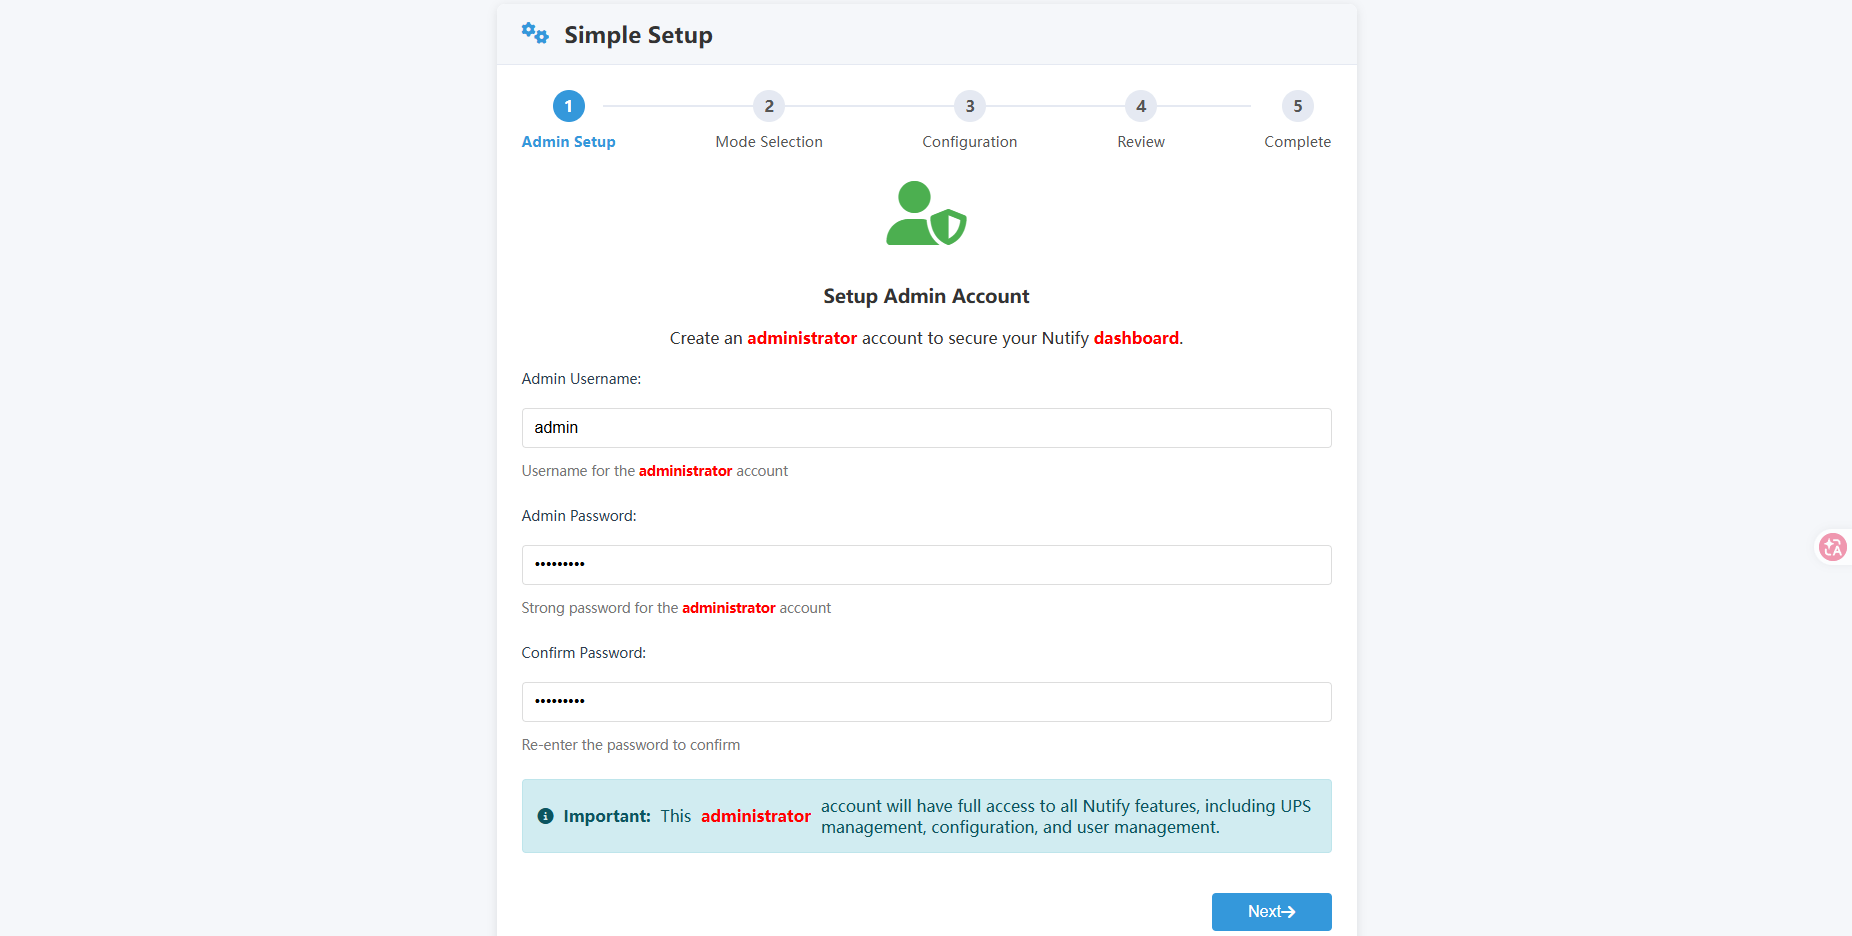
初始化配置:
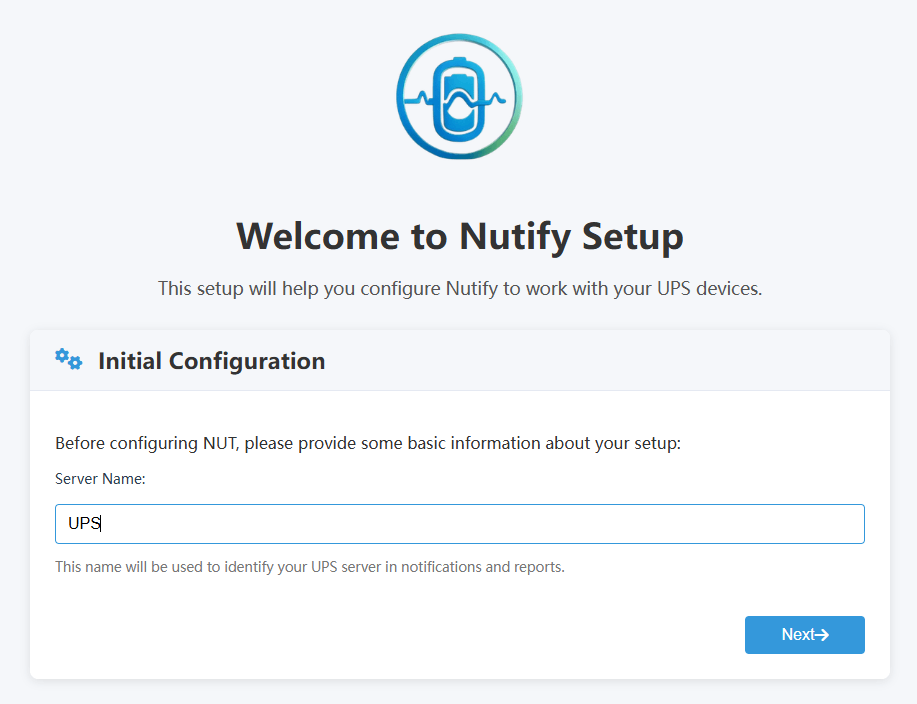
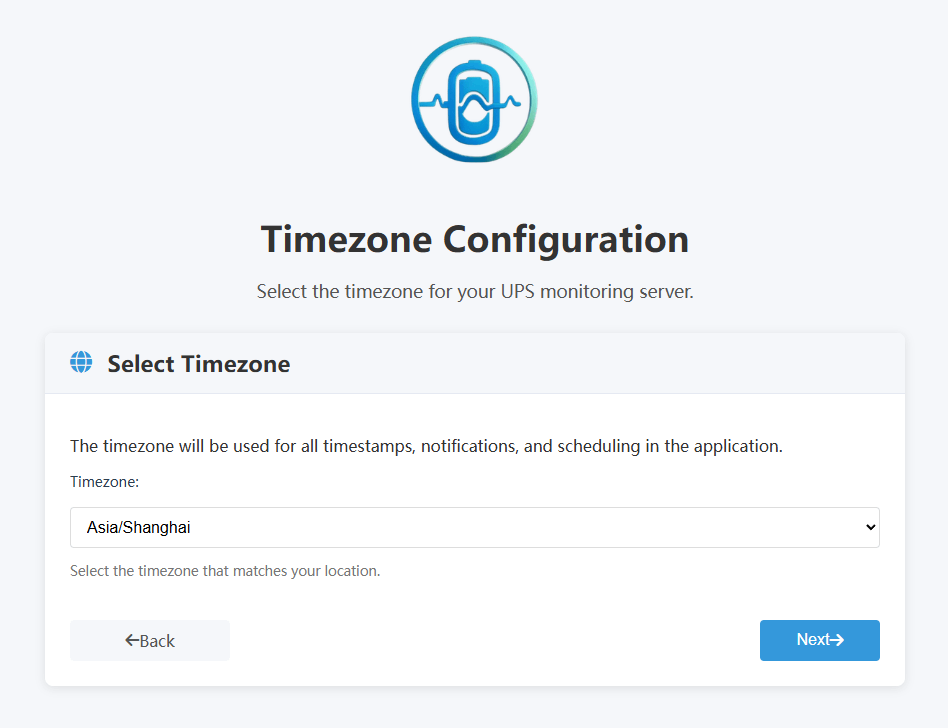
然后按步骤走。
为其访问创建登录用户:
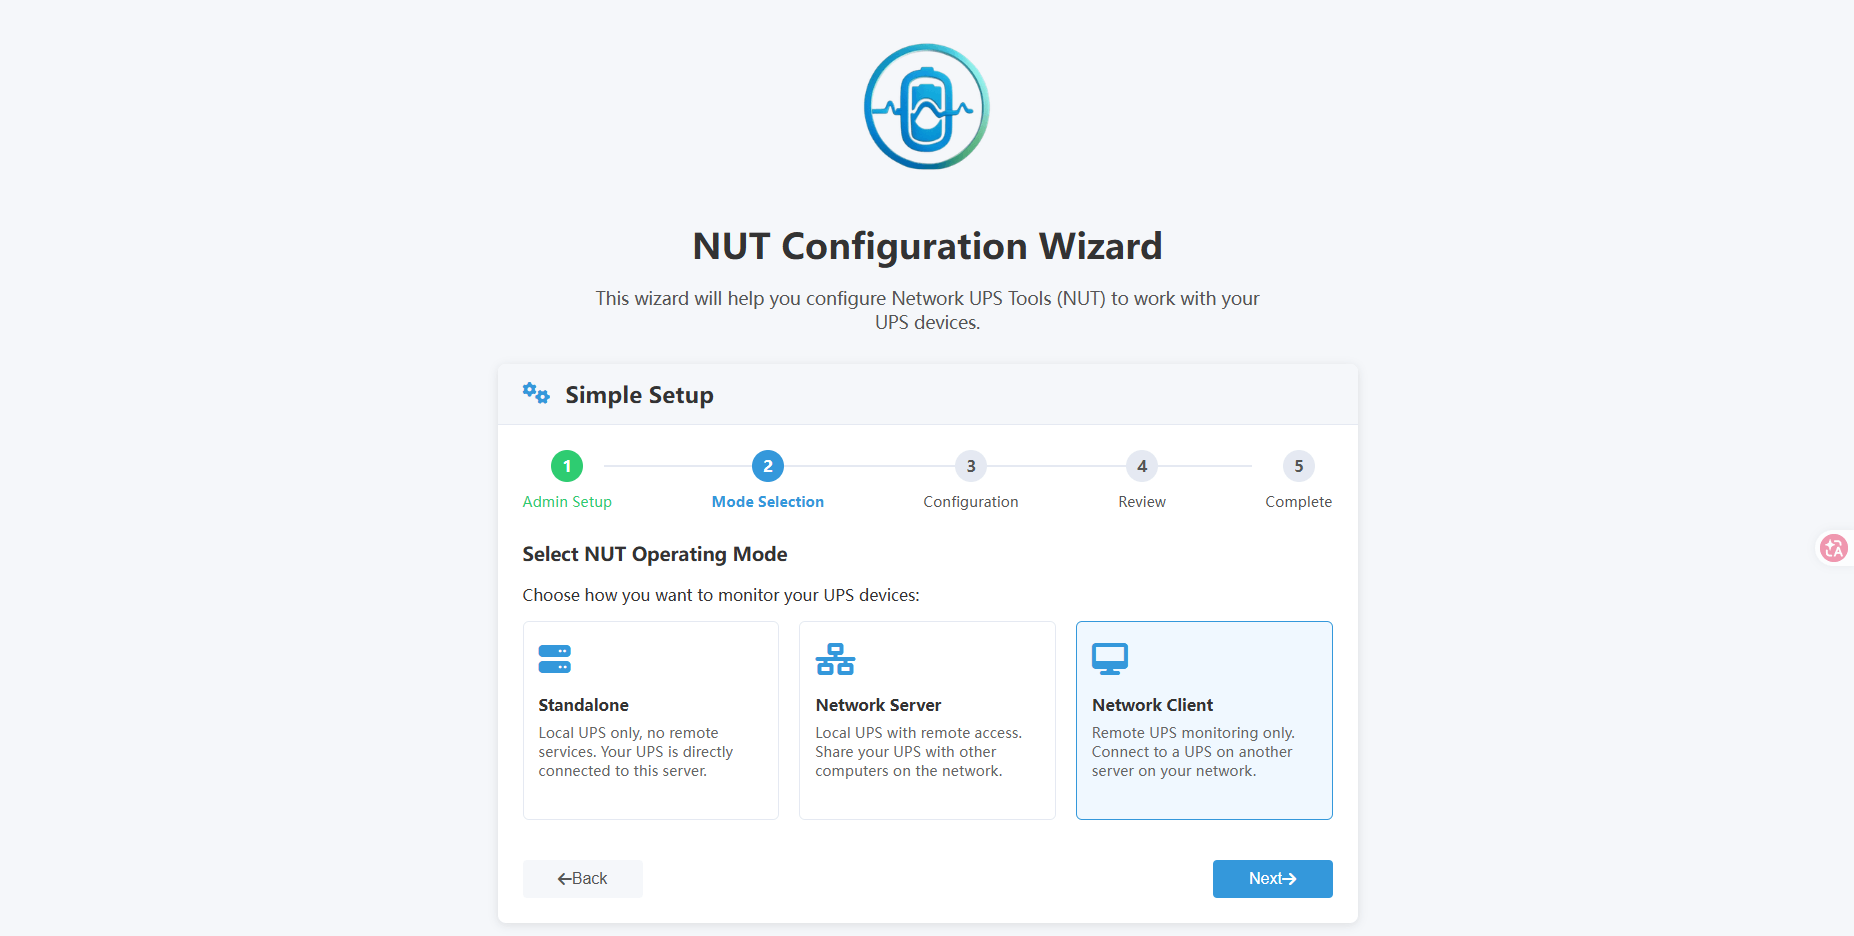
由于我们是在 OMV 上已经使用 nut-plugin 开启了 server 服务,在容器这里只需接入服务来充当 Web-UI ,所以选择 Network Client 模式:
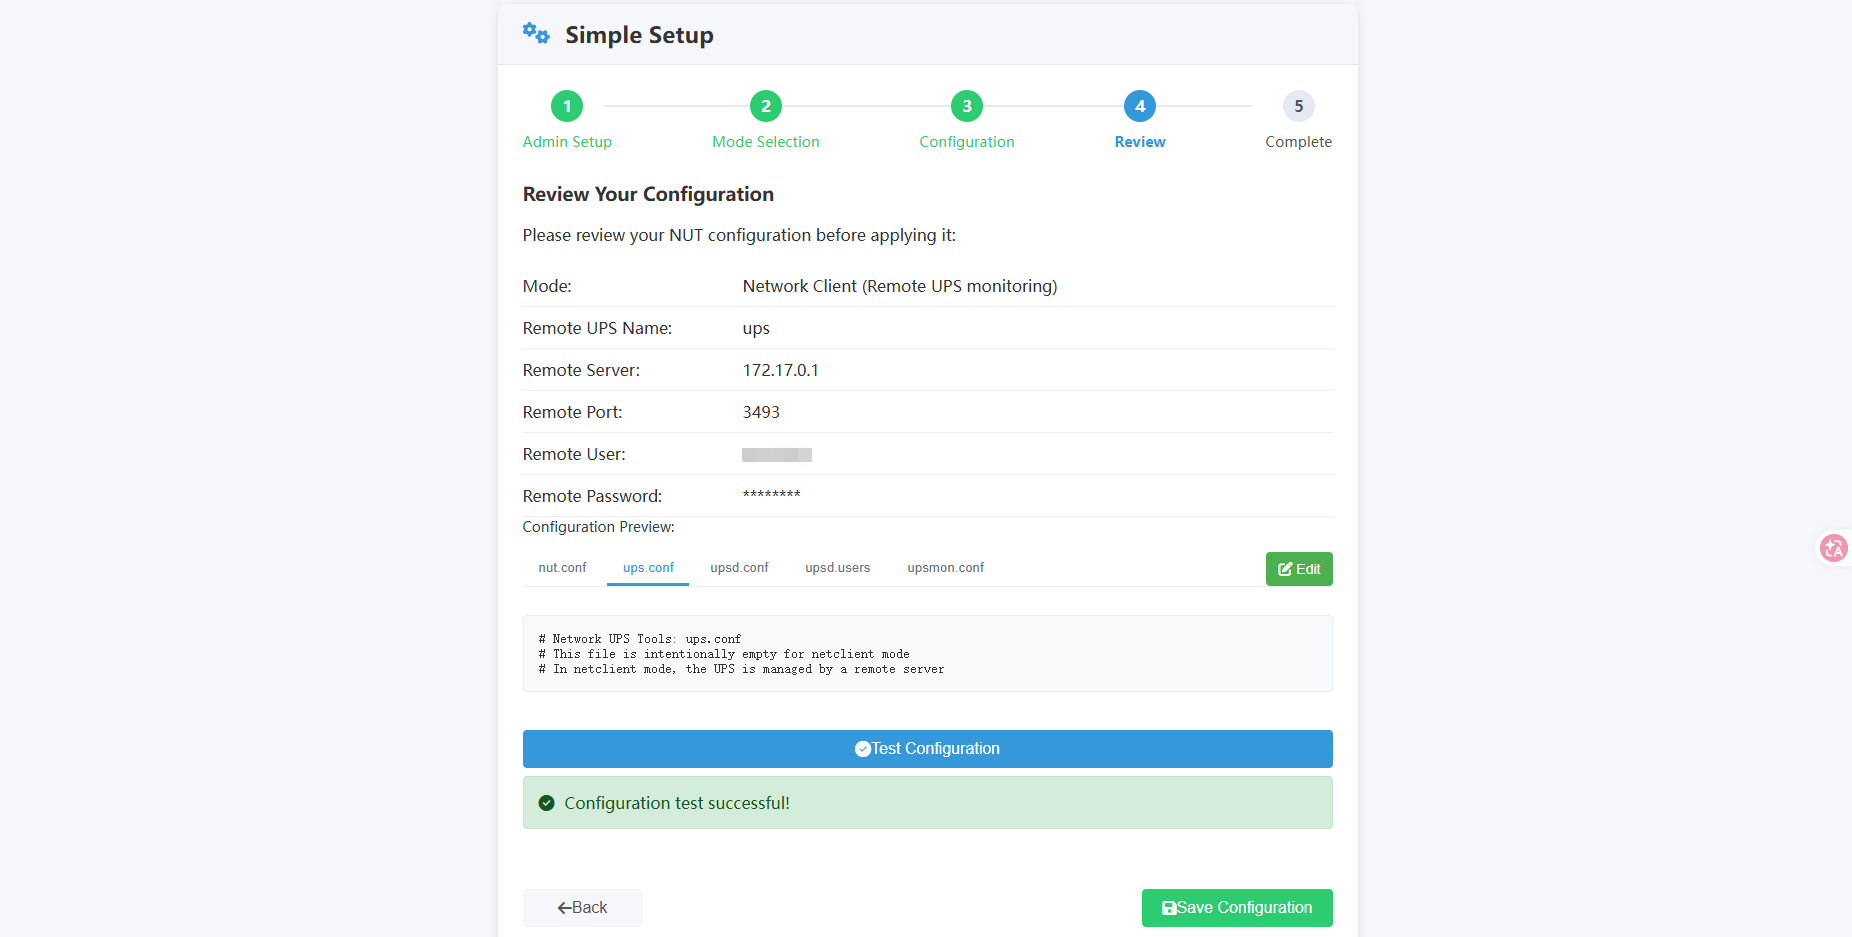
接着核对信息并 Test:
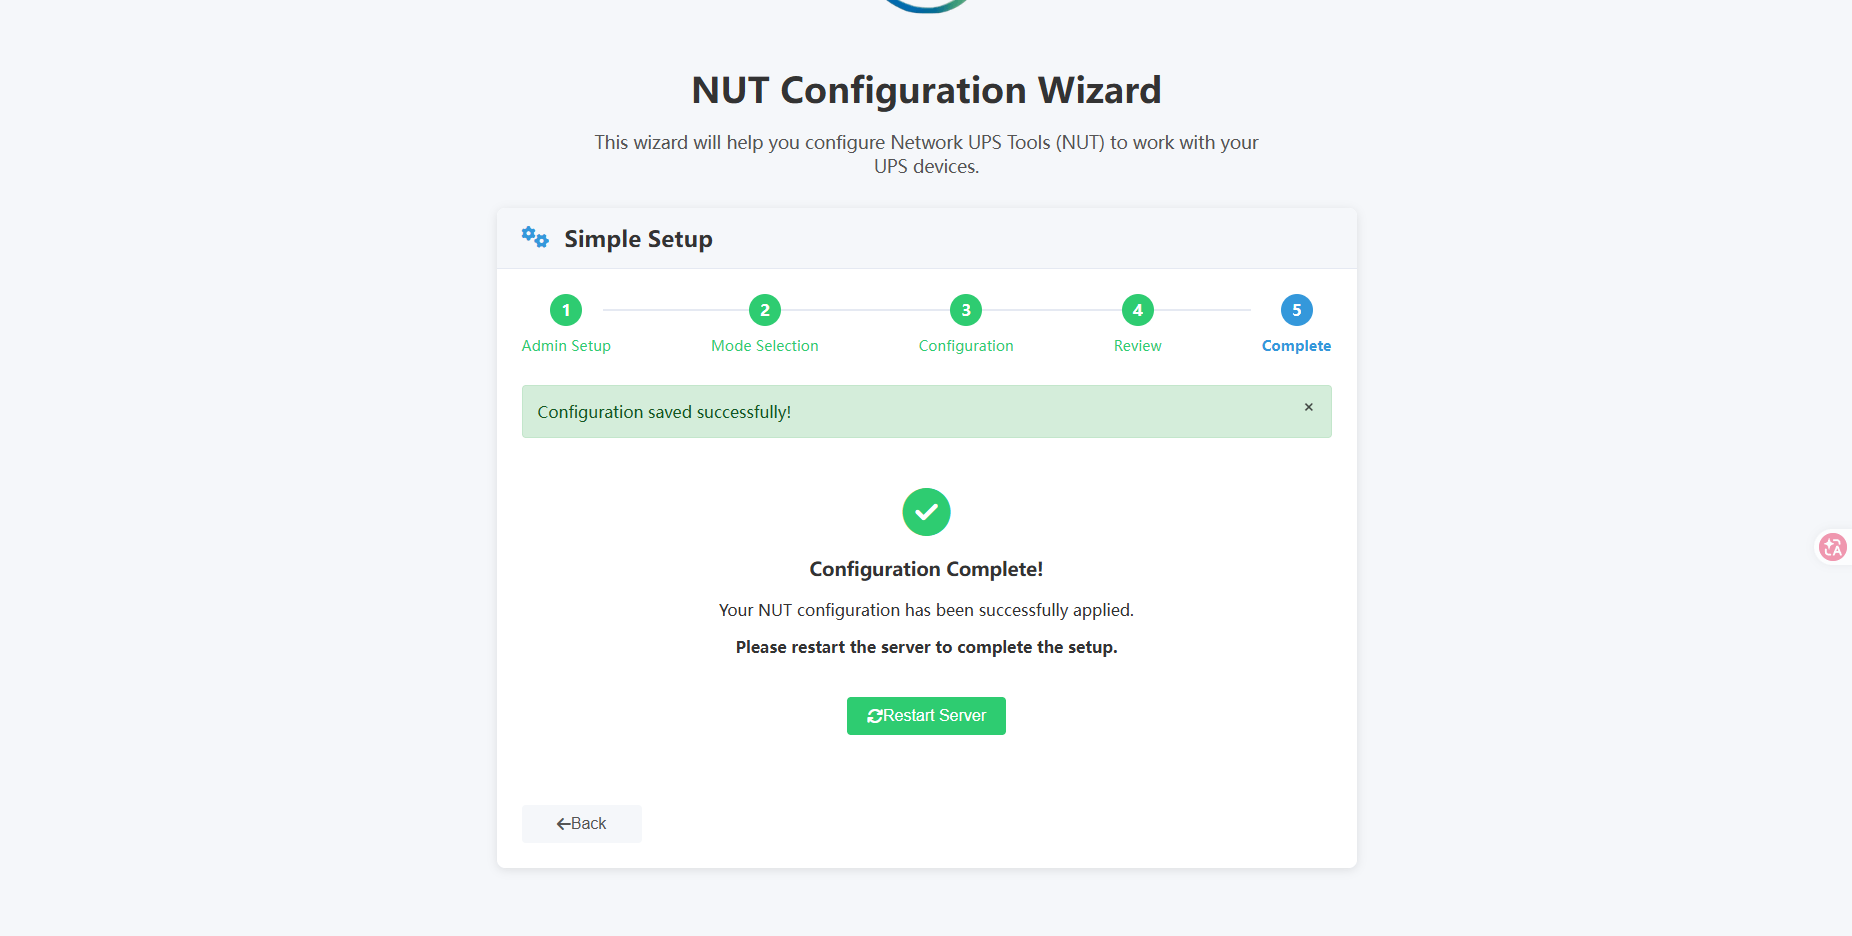
最后 Restart ,等待重启:
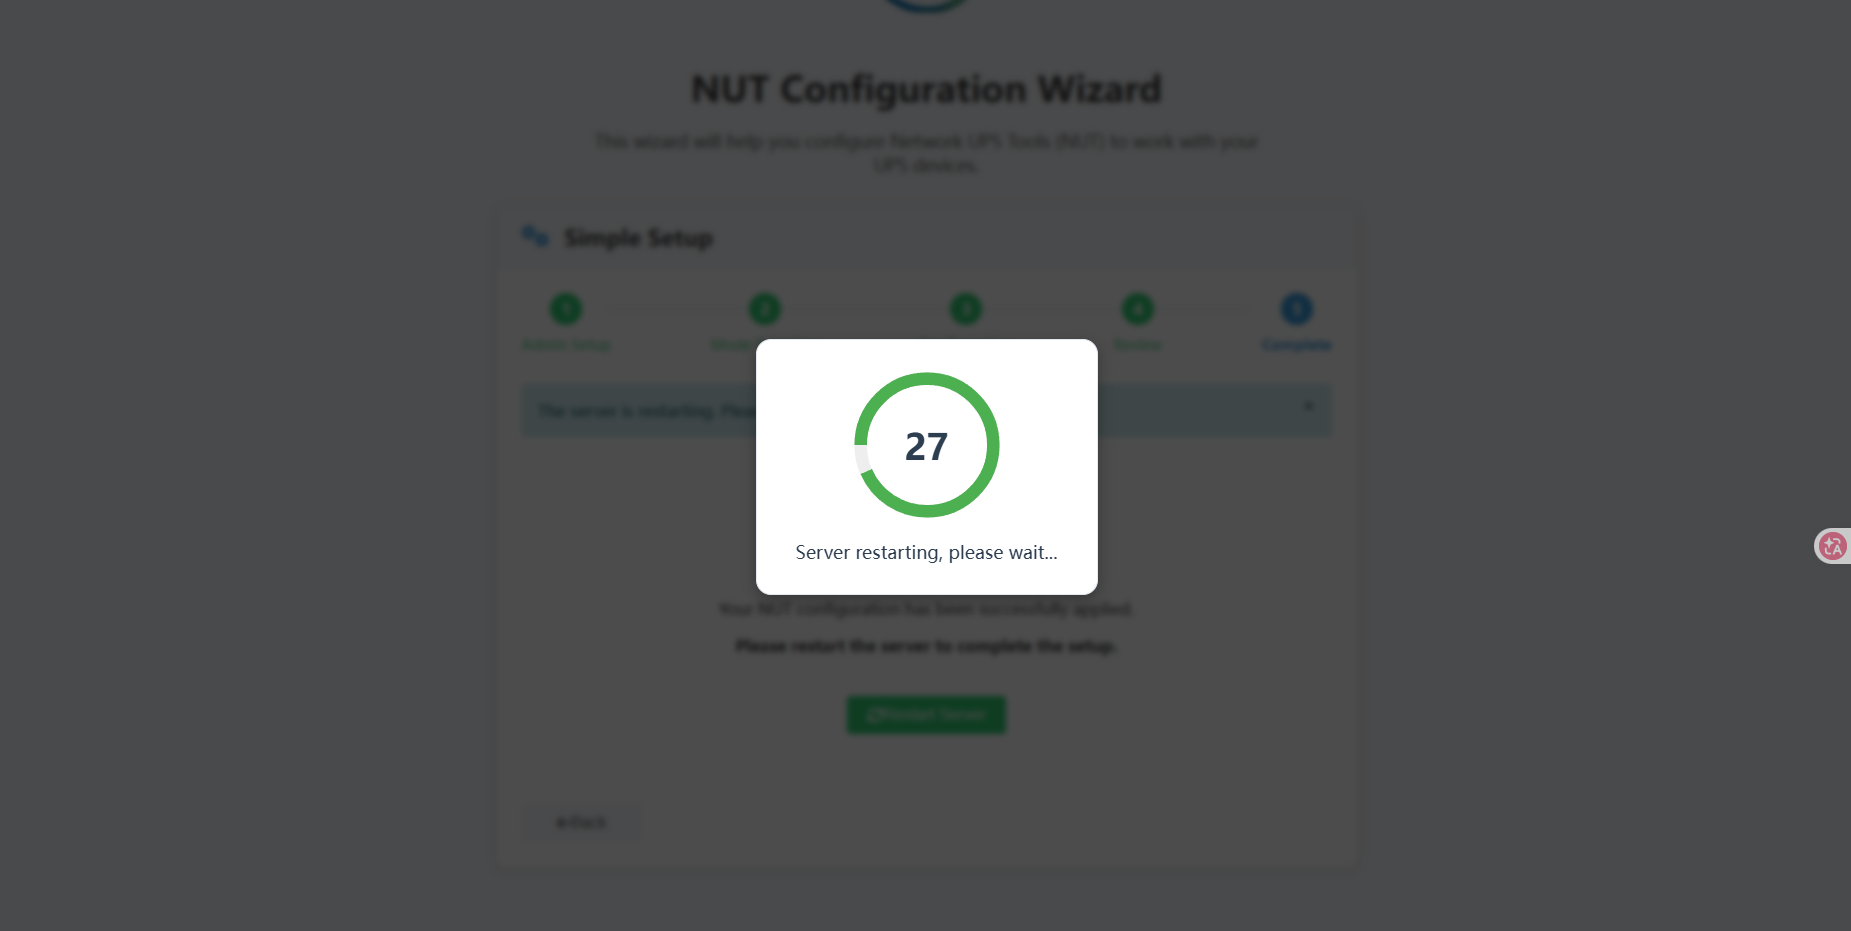
重启后登录刚才的账号:
ps:
如果不用 OMV 的 nut-plugin 插件,可以使用 Standalone 模式,然后进行配置(注意:记得在前面 docker-compose.yaml 配置中配置 NUT daemon communication port 的端口映射):
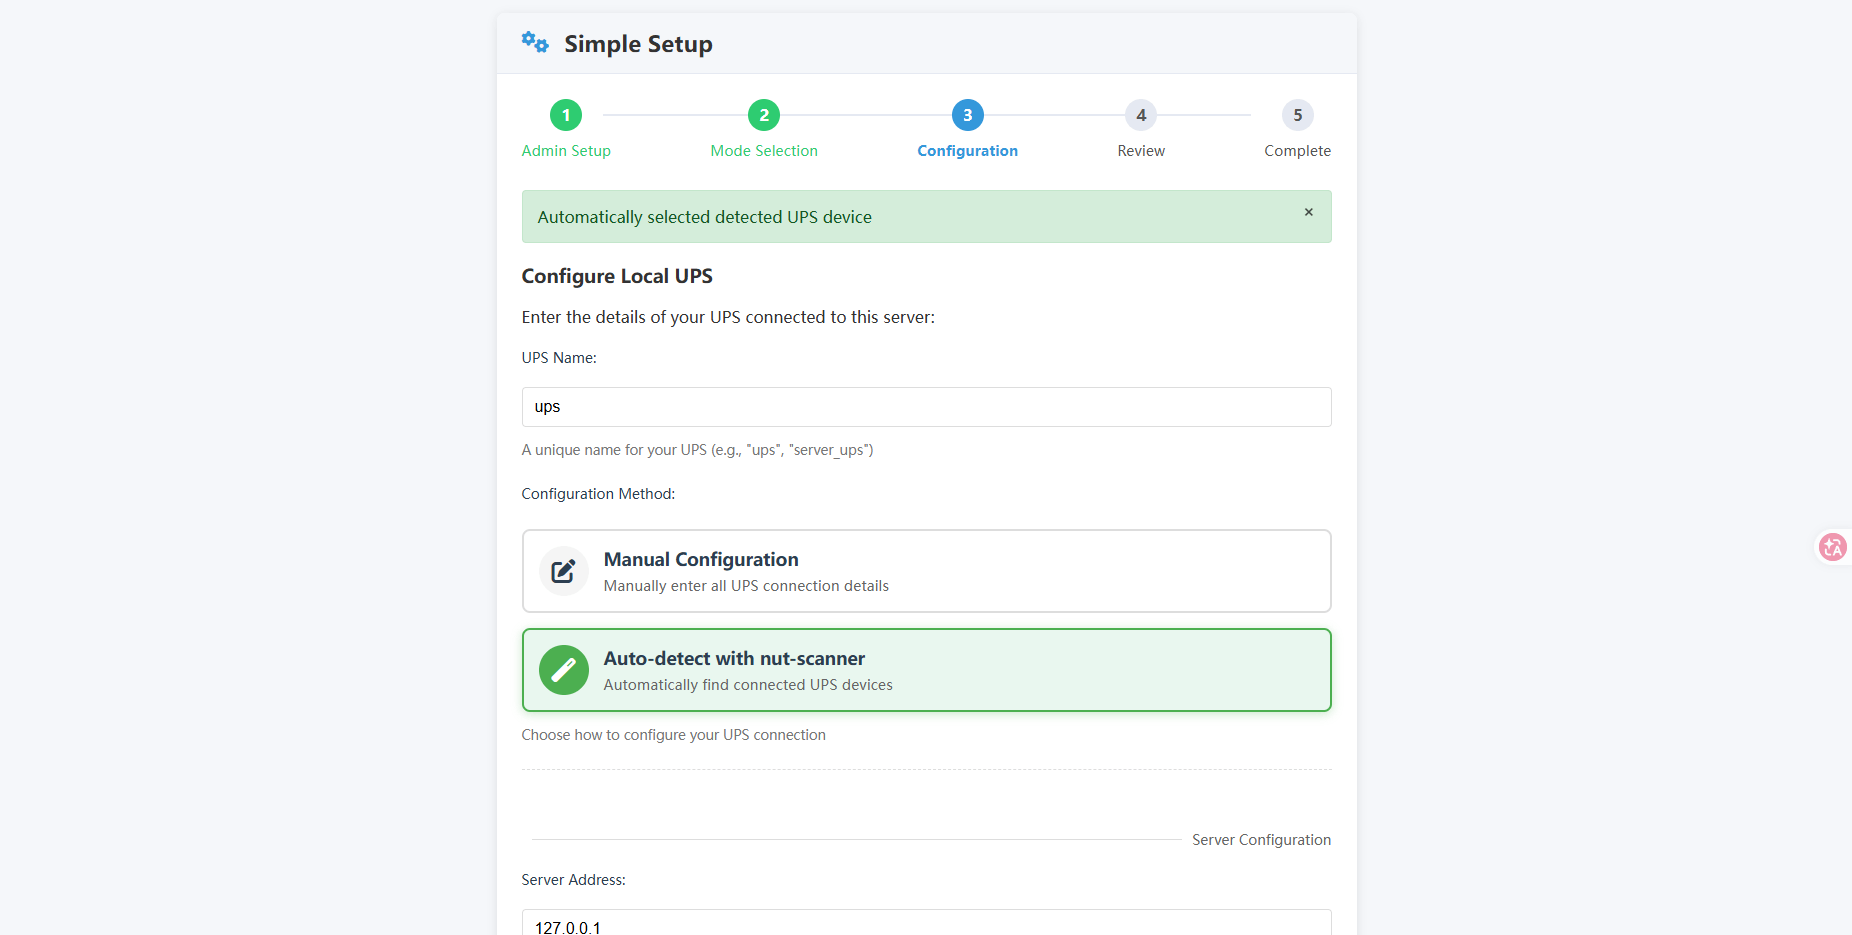
如果使用 Standalone 模式,由于是把设备和网络跟宿主机互通了,因此只要有设备,都可以直接 auto 检测出来。
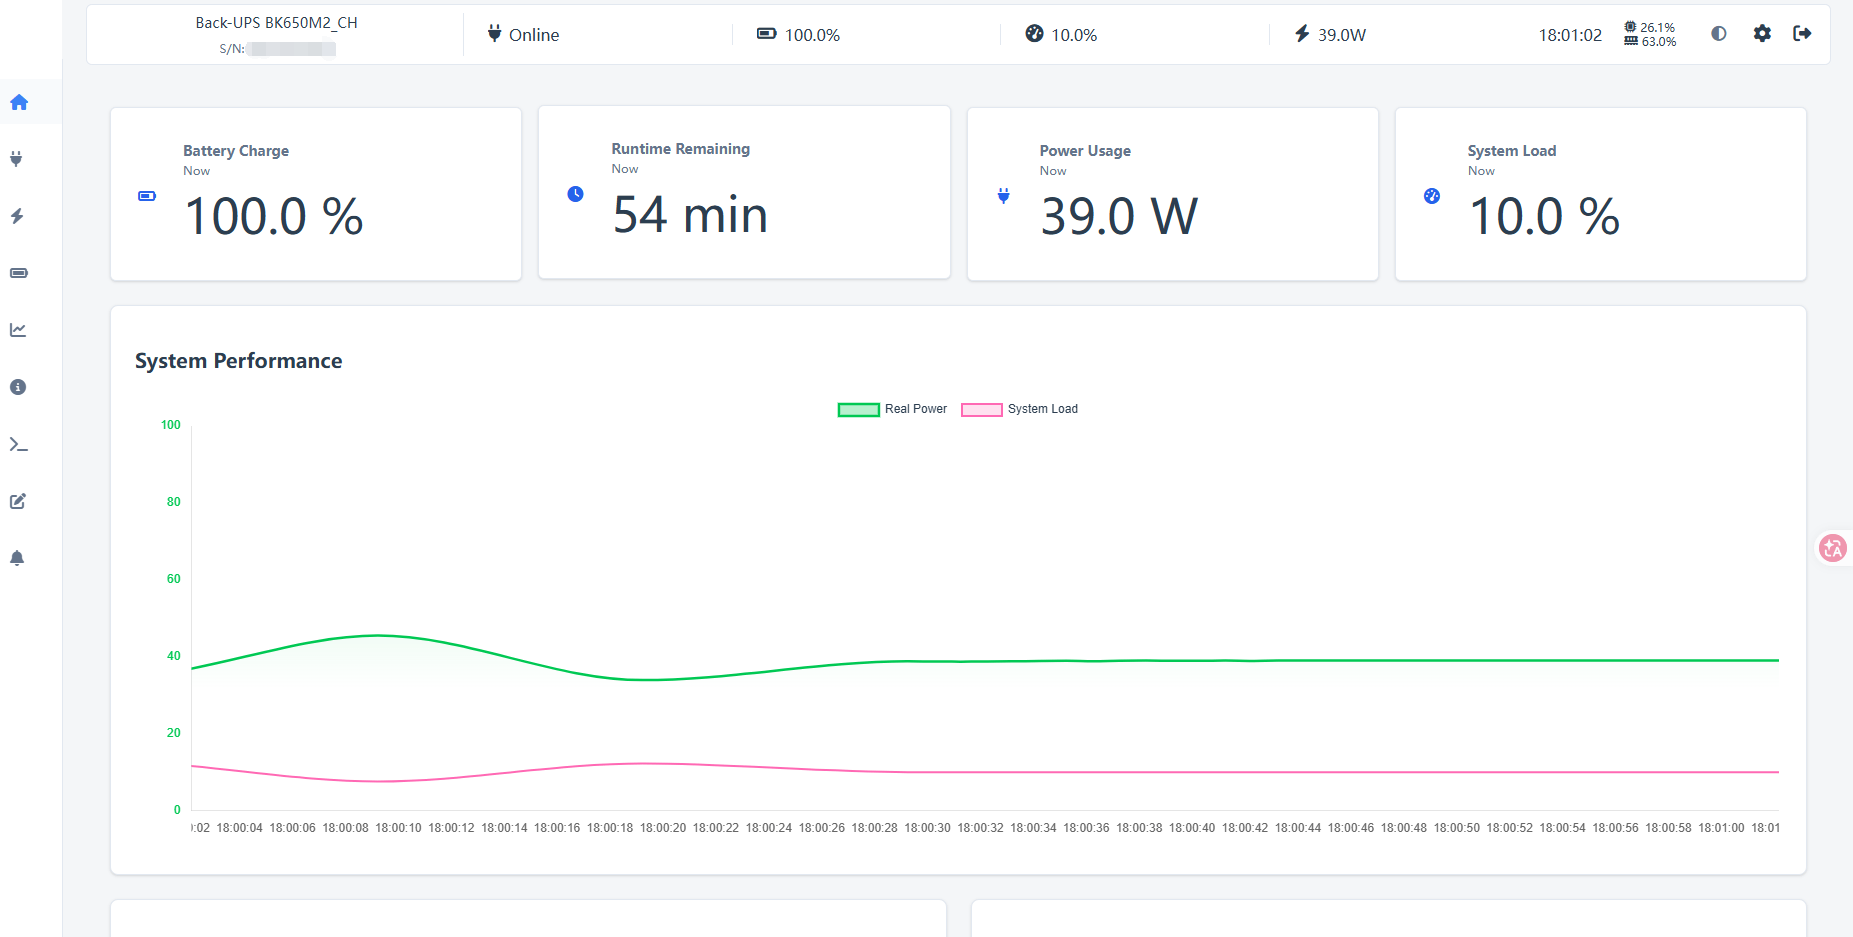
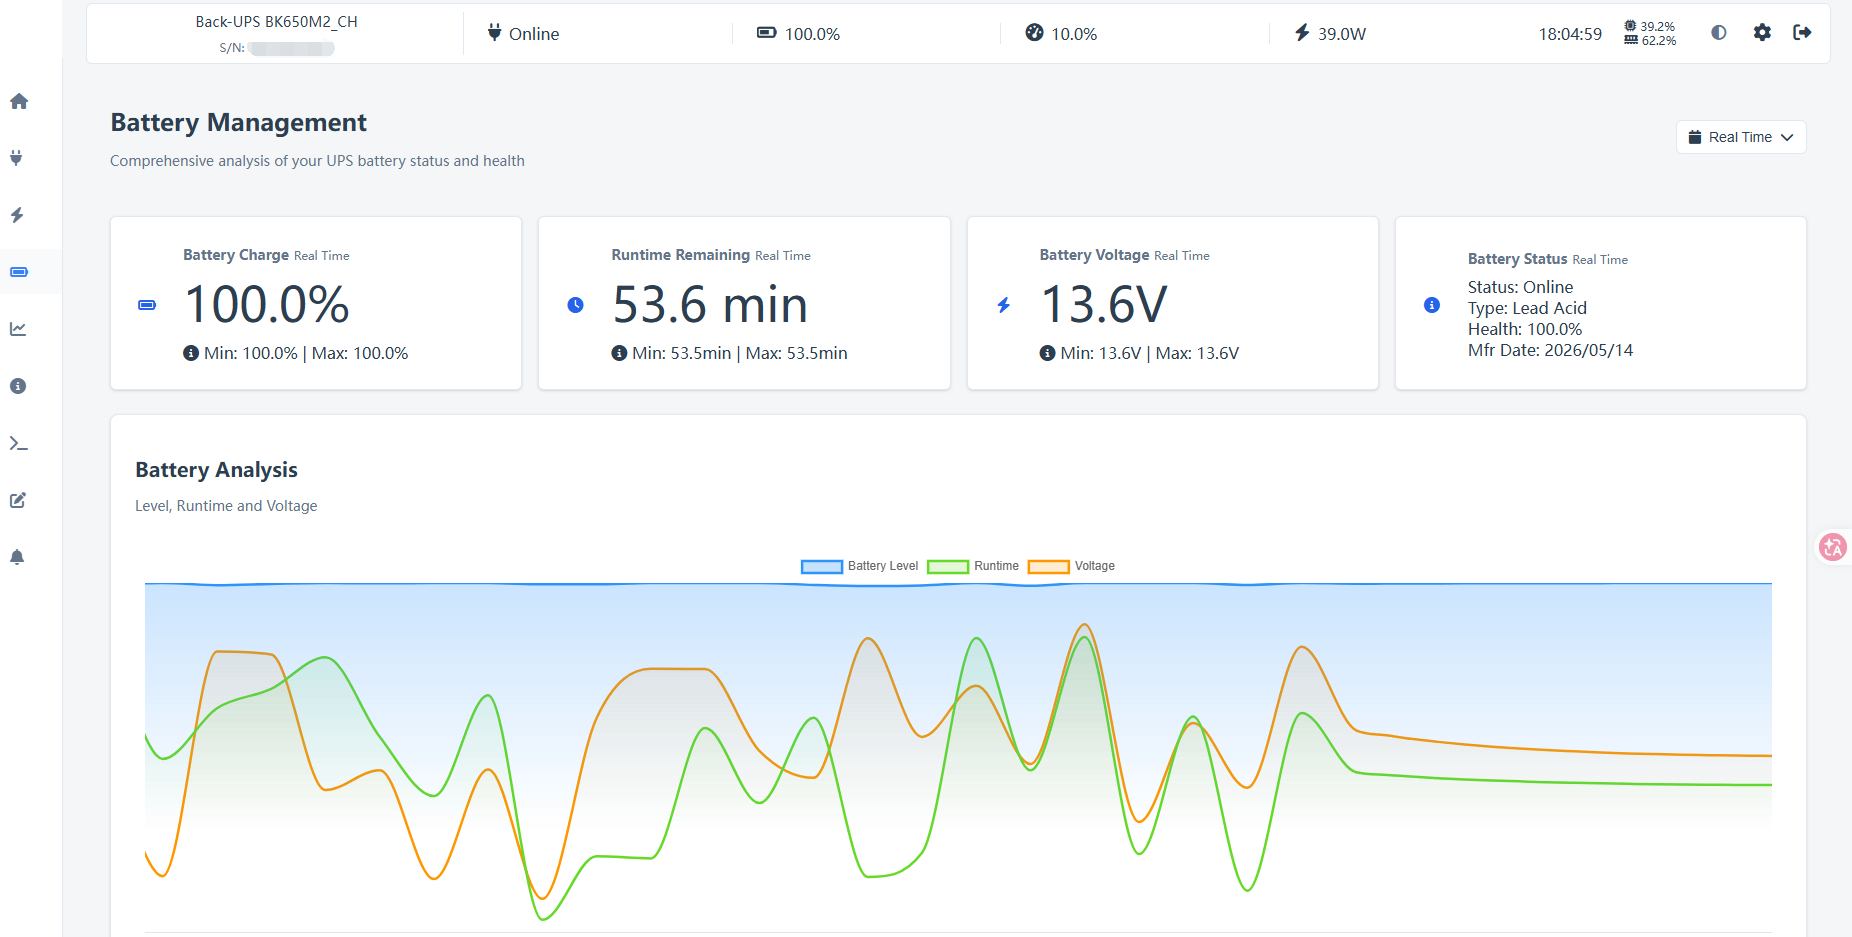
状态展示:

剩下的其它功能就自己去体验吧。
帖子:https://www.reddit.com/r/selfhosted/comments/1j4x1p1/nutify_a_dockerized_nut_server_with_email_and/?tl=zh-hans
# nut_webui
项目:https://github.com/SuperioOne/nut_webgui
docker run -d \ | |
--name nut_webui \ | |
-e TZ=Asia/Shanghai \ | |
-e UPSD_ADDR=172.17.0.1 \ | |
-e UPSD_PORT=3493 \ | |
-e UPSD_USER=test \ | |
-e UPSD_PASS=strongpass \ | |
-e POLL_FREQ=30 \ | |
-e POLL_INTERVAL=2 \ | |
-p 28693:9000 \ | |
--restart unless-stopped \ | |
ghcr.io/superioone/nut_webgui:latest |
按需更改字段属性,这里就不多说了,毕竟对应的字段含义很好理解。
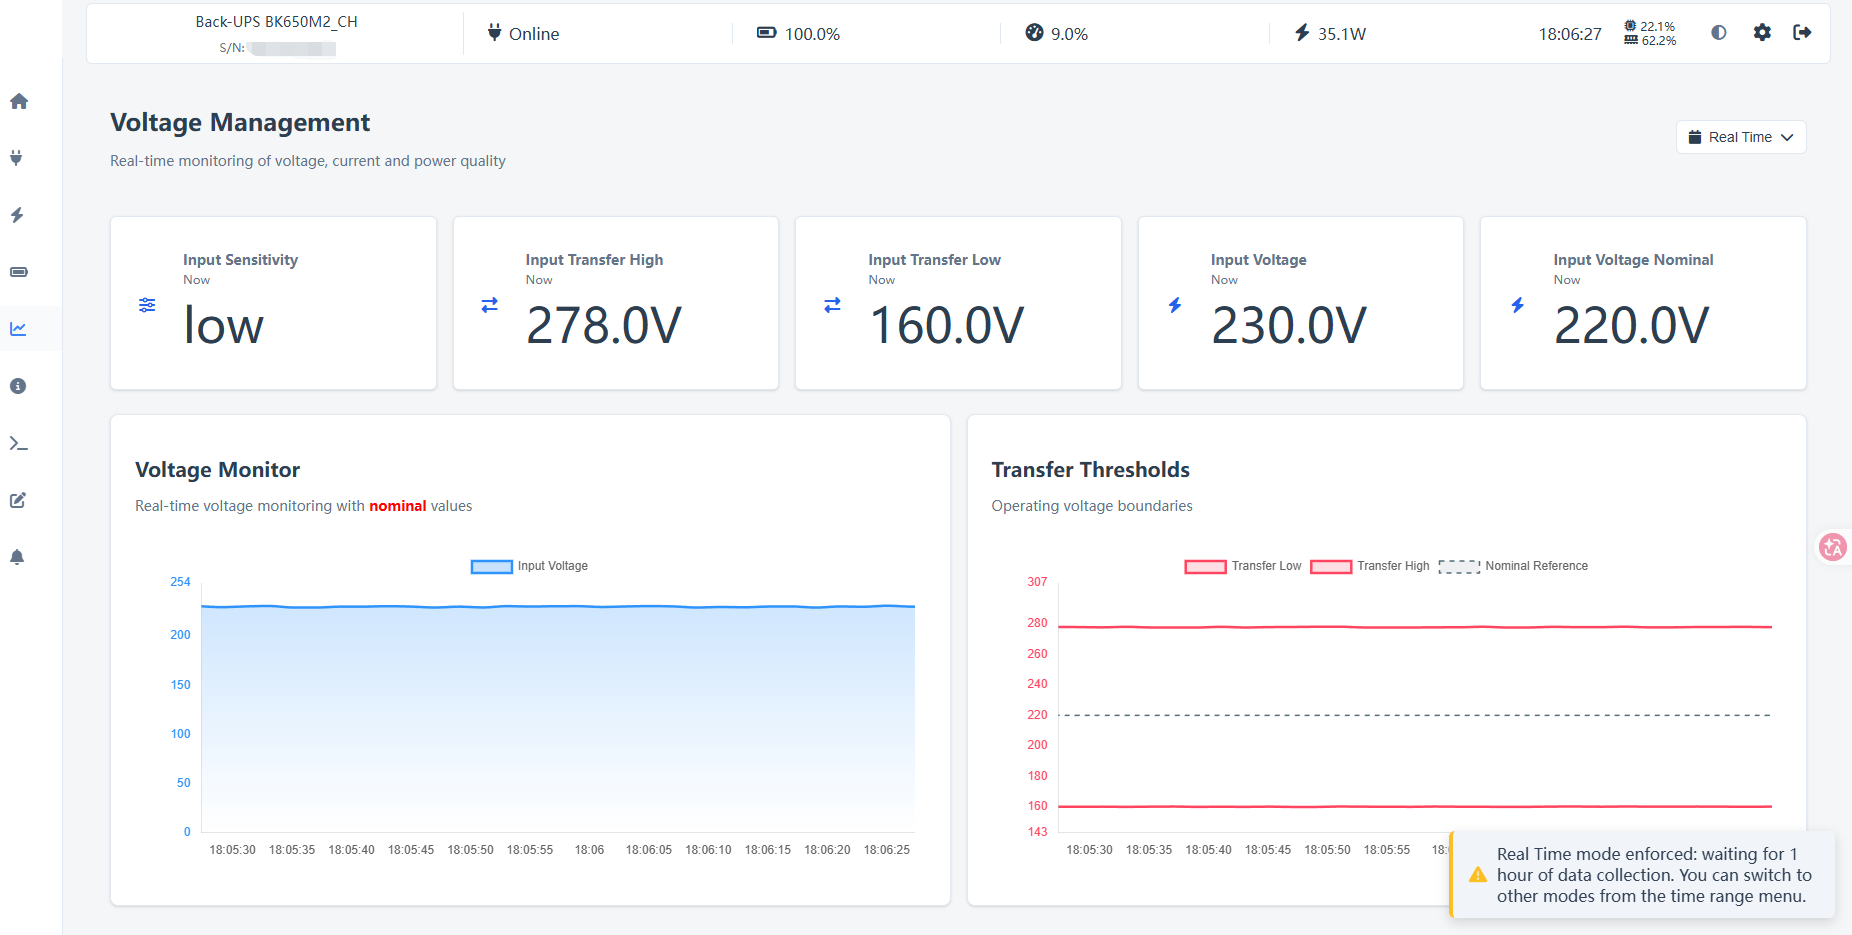
状态展示:
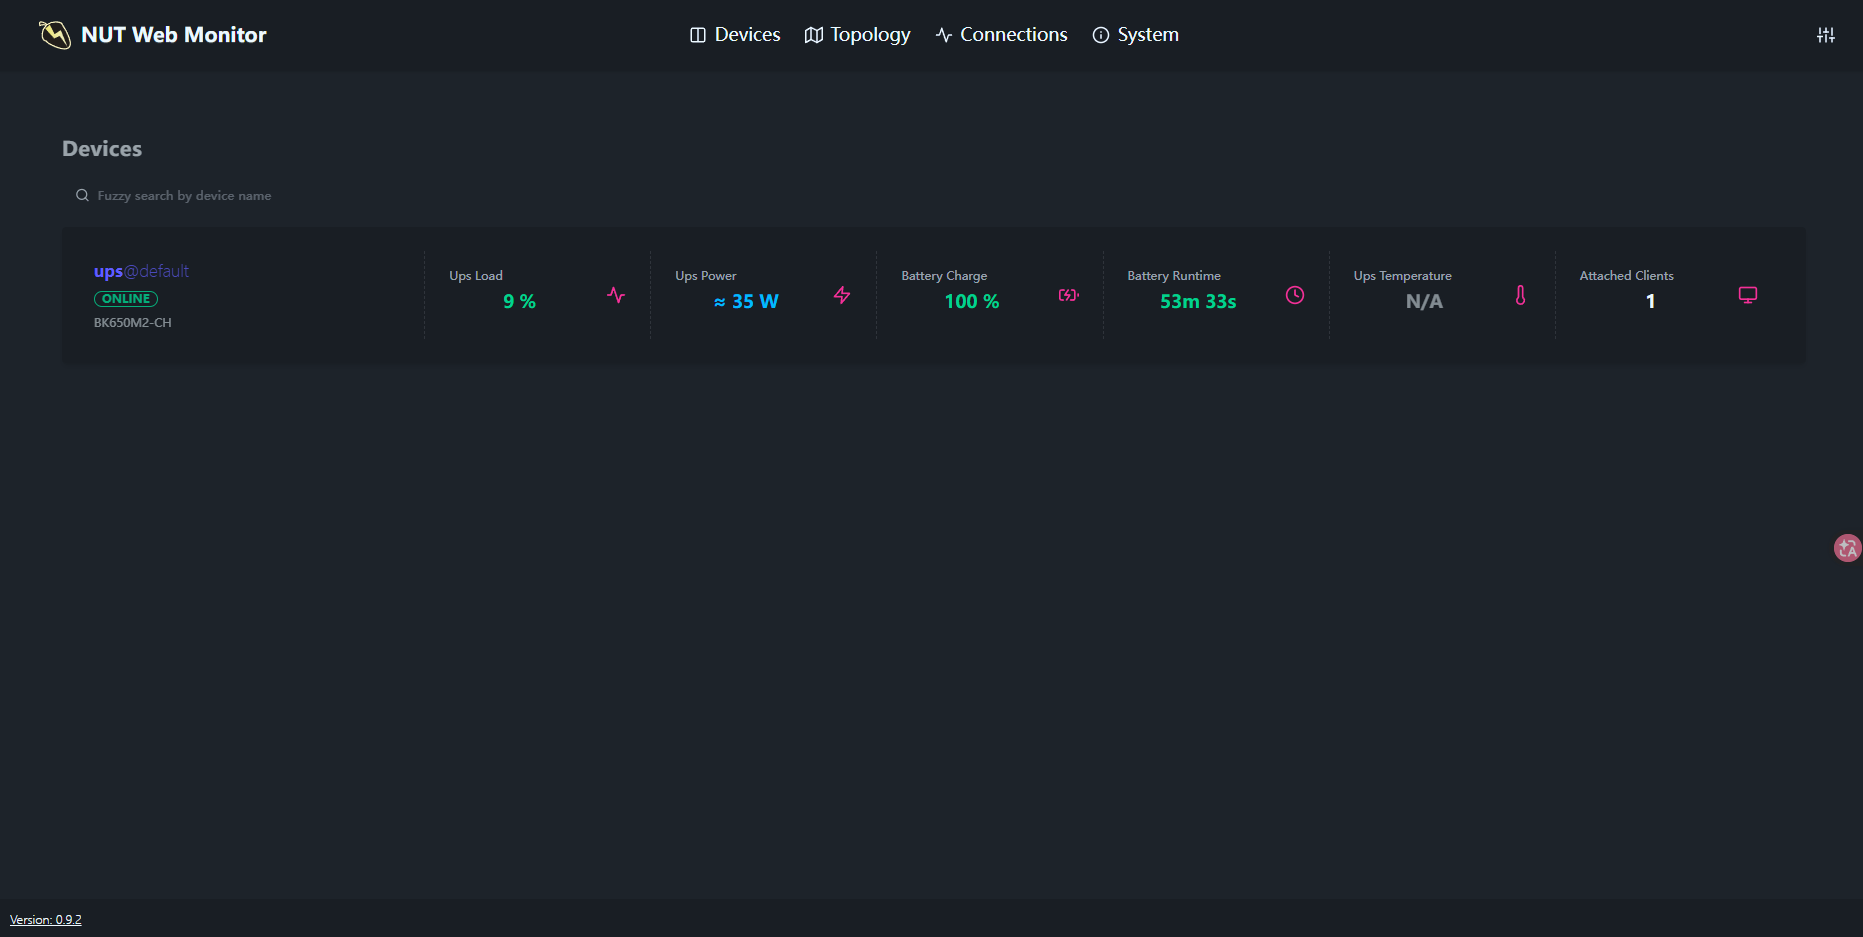
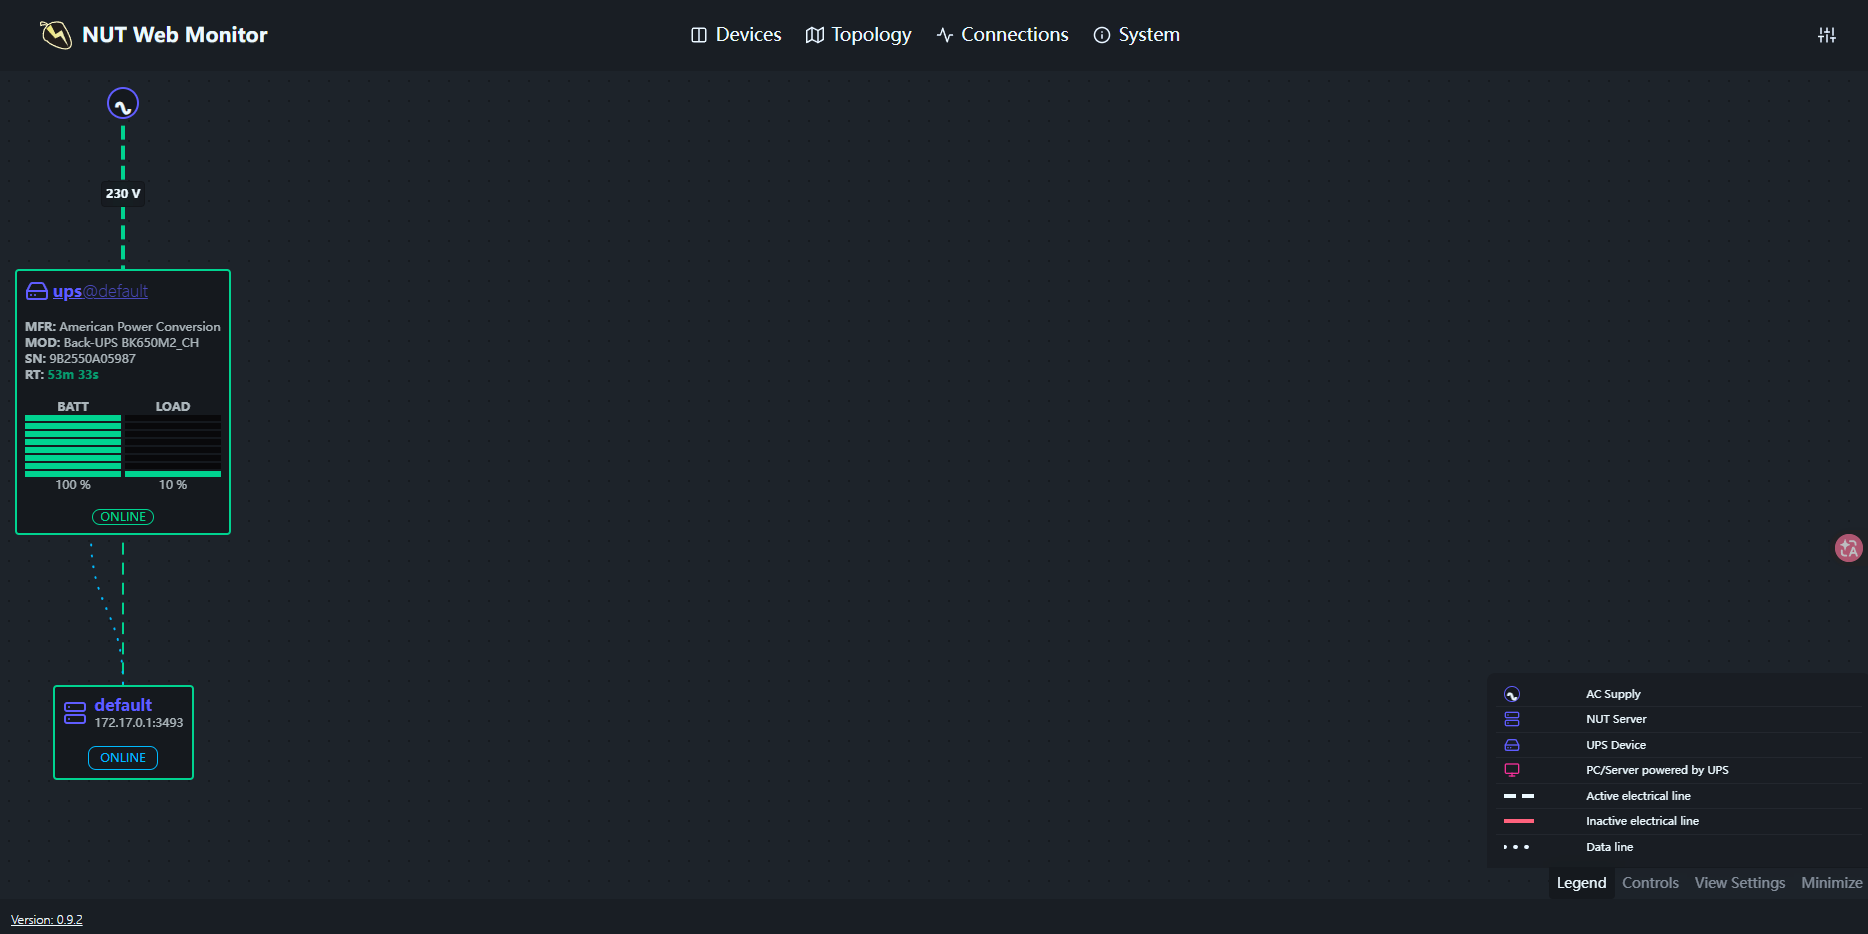
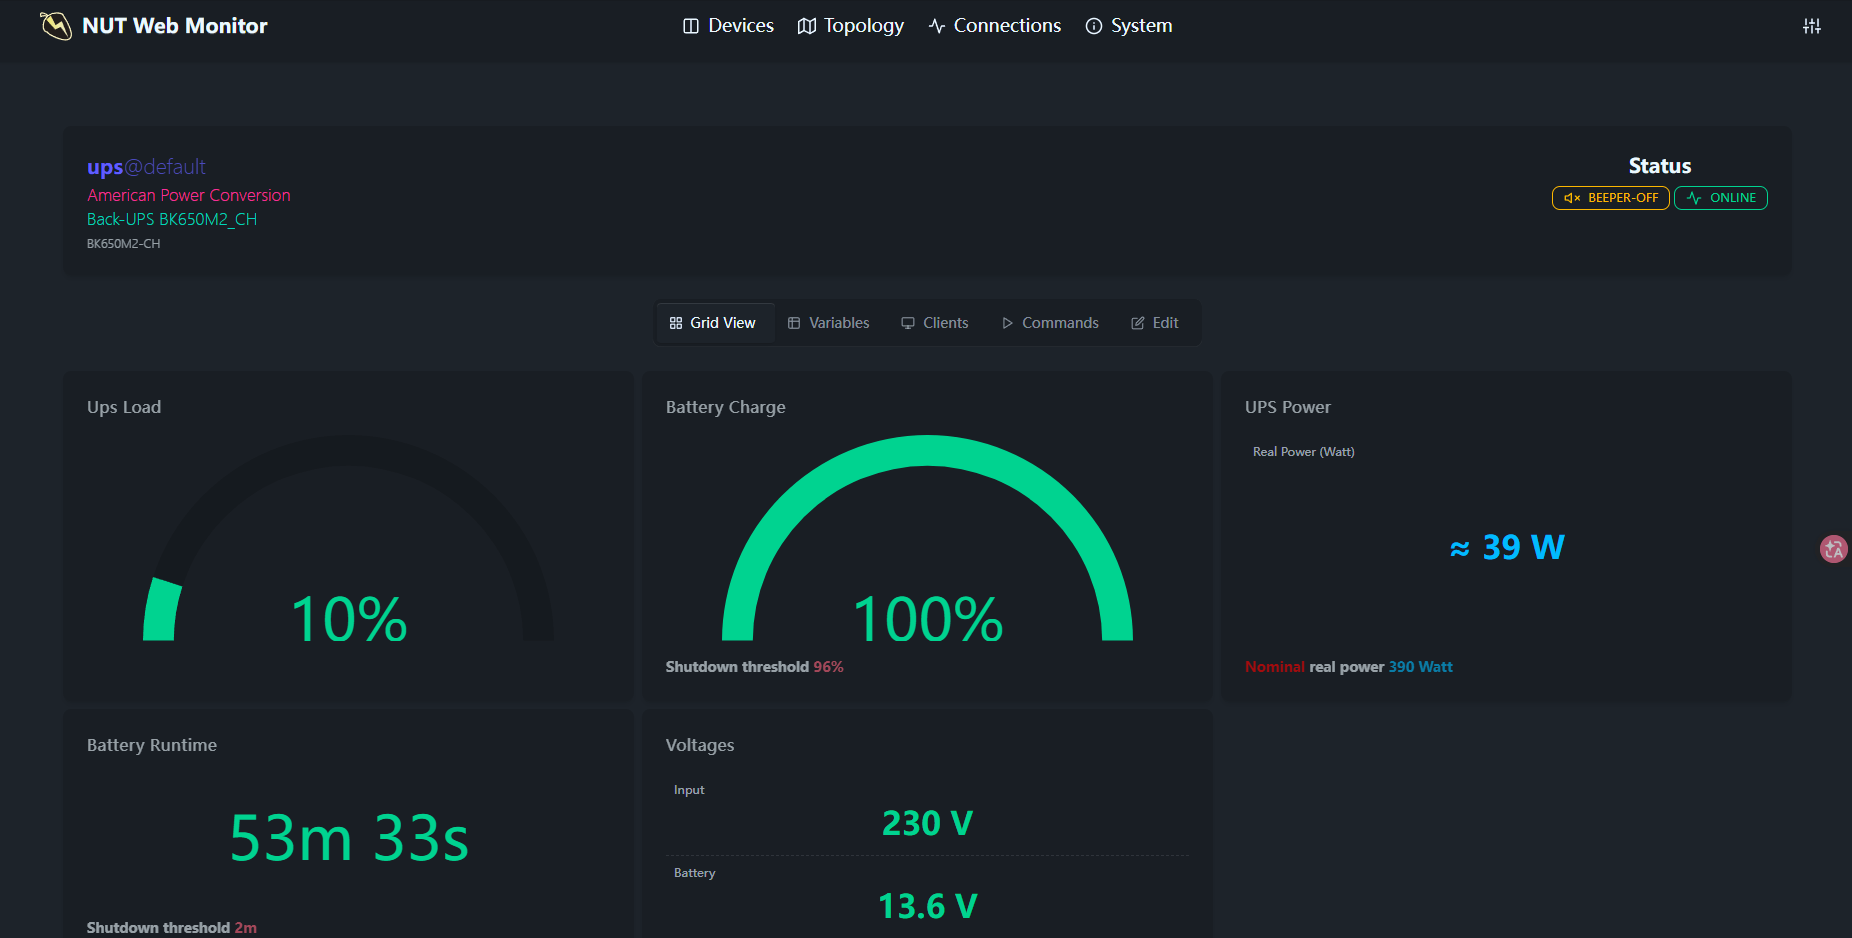
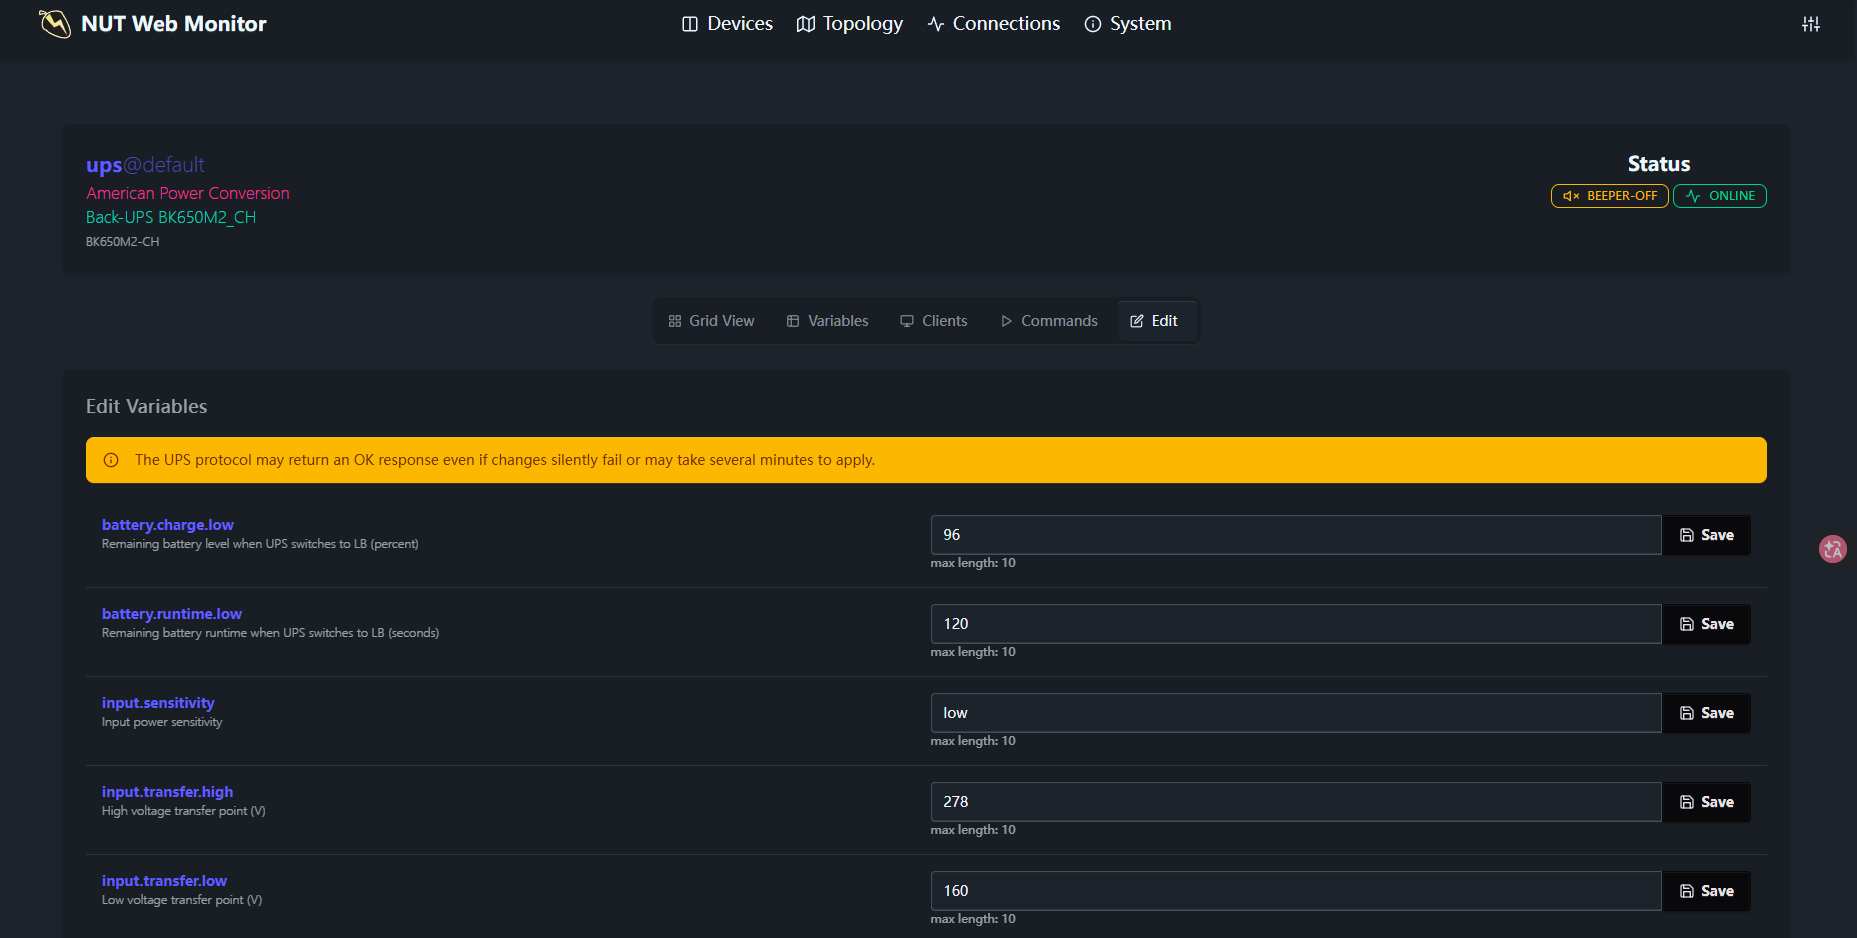
如果是多个 UPS 连接,可以参考:https://github.com/SuperioOne/nut_webgui/blob/master/docs/examples/09_multiple_nut_connection.md
# 总结
先说结论:
个人比较喜欢使用 nut_webui ,因为作为 Web-UI 能显示的 UPS 的信息该有的都有,也比较现代化,资源占用也小。
nut-webui 是资源占用最小的,适合低端硬件,当然画面风格可能看起来比较传统,但是如果你是开发人员,可以重制 .html 网页风格。
PeaNUT 占用相对有点高,并且与其它较之相比没什么突出的功能,算是里面最不想推荐的。
Nutify 在这里算是全能选手了,因此在资源占用方面不值一提,毕竟它还支持 Email 通知、电费统计、碳排量、多用户安全登录等操作,这是其它所没有的。
资源占用情况:

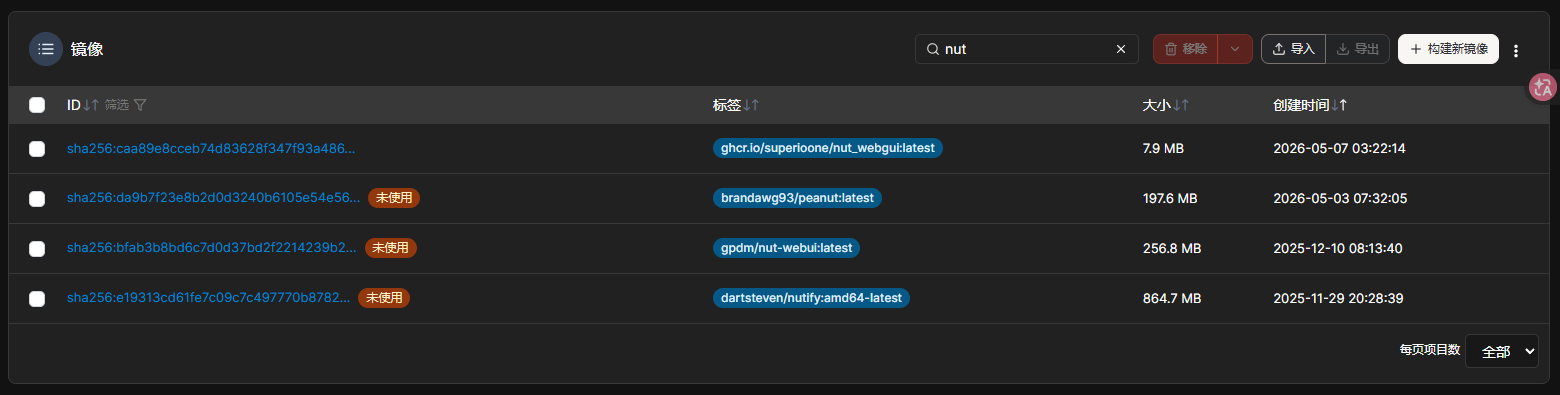
镜像容量:
# Other
其它杂七杂八的知识拓展参考:
https://zackreed.me/installing-nut-on-ubuntu/
https://networkupstools.org/docs/man/apcsmart.html
https://forum.openmediavault.org/index.php?thread/54576-going-deeper-into-nut/